
Pantry projects here run from $10 roll-out boxes in an existing cabinet to a walk-in with a $1,500 marble counter, and what you store plus the floor space you have decides which fits.
Depth trips up pantries of any size: shelves deeper than 16 inches hide items behind other items.
1. Pick a Pantry Type
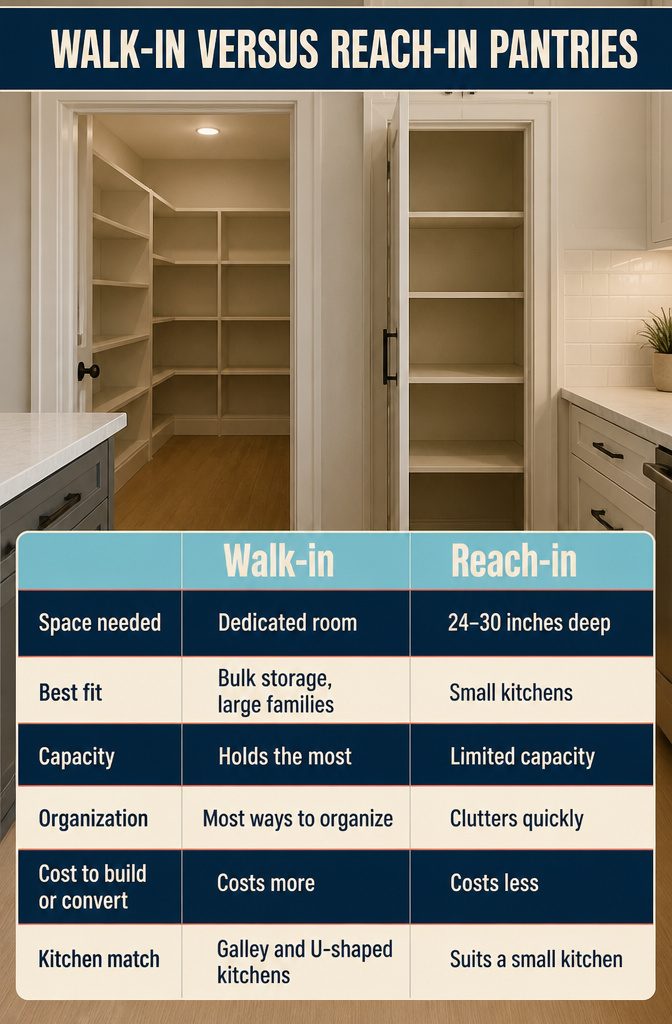
A walk-in holds the most and offers the most ways to organize, but it needs a dedicated room and costs more to build or convert. Galley and U-shaped kitchens handle one best.
A reach-in suits a small kitchen, though capacity is limited and it clutters quickly; plan for 24–30 inches of depth. In a walk-through, keep shelves from crowding the path so traffic keeps moving.
| Type | Space needed | Best fit |
|---|---|---|
| Walk-in | Dedicated room | Bulk storage, large families |
| Reach-in | 24–30 inches deep | Small kitchens |
| Walk-through | Passage between rooms | Kitchen to mudroom or garage |
| Butler’s | n/a | Prep, appliances, tableware |
| Hidden | Built into cabinetry | Subtle storage |
| Open | n/a | Small or large kitchens |
Recommended Products

【Important Note】This kitchen cabinet organizer is designed for frameless cabinets only and will not fit cabinets with frames around the doors

[🔝 WARM TIPS]: Please note that this pull out cabinet organizer suitable for cabinets with internal width exceeding 13" and depth exceeding 21". This pull out drawer for cabinets with Upgraded Raising Pads are compatible with both frameless cabinets and framed cabinets with edge heights up to 0.4 inches. It is essential to carefully measure your cabinet's dimensions before installation to ensure compatibility.

IMPORTANT NOTICE: Our cabinet pull out shelves are not suitable for cabinets with lips.Before ordering, please measure your cabinet dimensions correctly using the method shown in the picture.If your deep cabinet has a lip, please choose from our other drawers options designed for cabinets with a lip available in the store
2. Vertical Space and Shallow Shelves
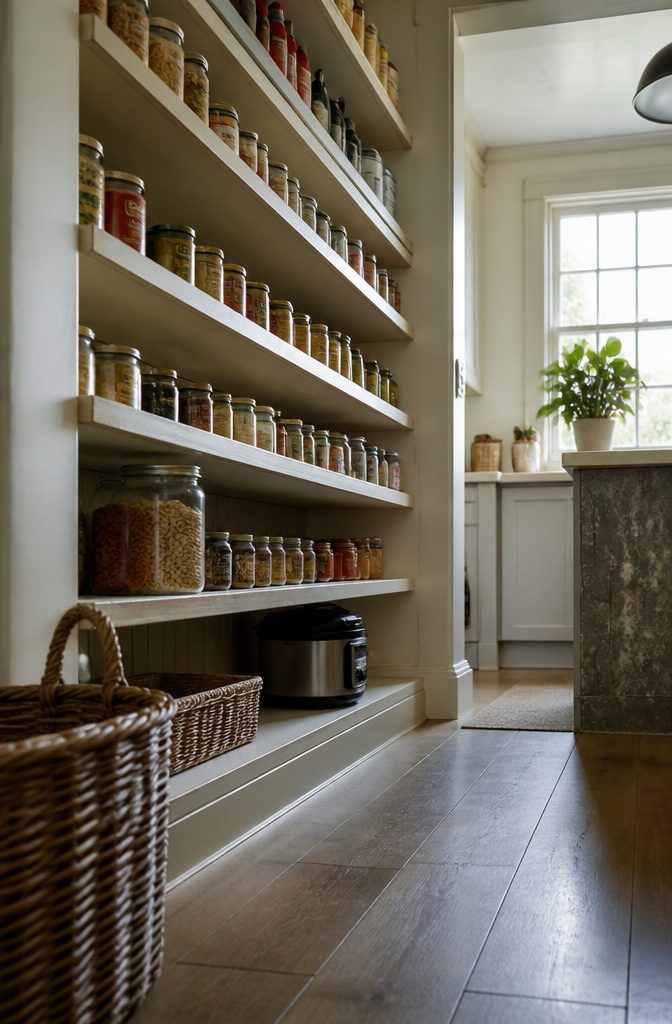
Build upward, then match each shelf’s depth to what sits on it. Keep shelves no deeper than 16 inches.
Use 14 inches for easy reach, 10 inches for general storage, and 6 inches for cans and bottles. Above eye level, step the shelves back, 14 inches and then 12, so you can see what’s up there.
Shelves that are too deep are one of the most common pantry mistakes, because items disappear behind other items.
Shallow shelves hold a single row, so everything stays visible at a glance. Save the deeper shelves, low down, for baskets, bulk goods, and small appliances.
Recommended Products

Includes 3 pack under shelf baskets, each measures 15 “ (L) X 10”(W) X 4”(Height), the sliding arm: 1.5” height, fits for shelf thickness no more than 1.5 inch.

The 2-layer small Kitchen Storage shelves providing a set of adjustable feet and 2 PP shim.

【Maximize Space】 Our 4-pack under cabinet shelf basket organizers efficiently utilize the unused space beneath your cabinets, providing additional storage for kitchen essentials and maximizing your cabinet space
3. Pull-Outs, Drawers, and Baskets
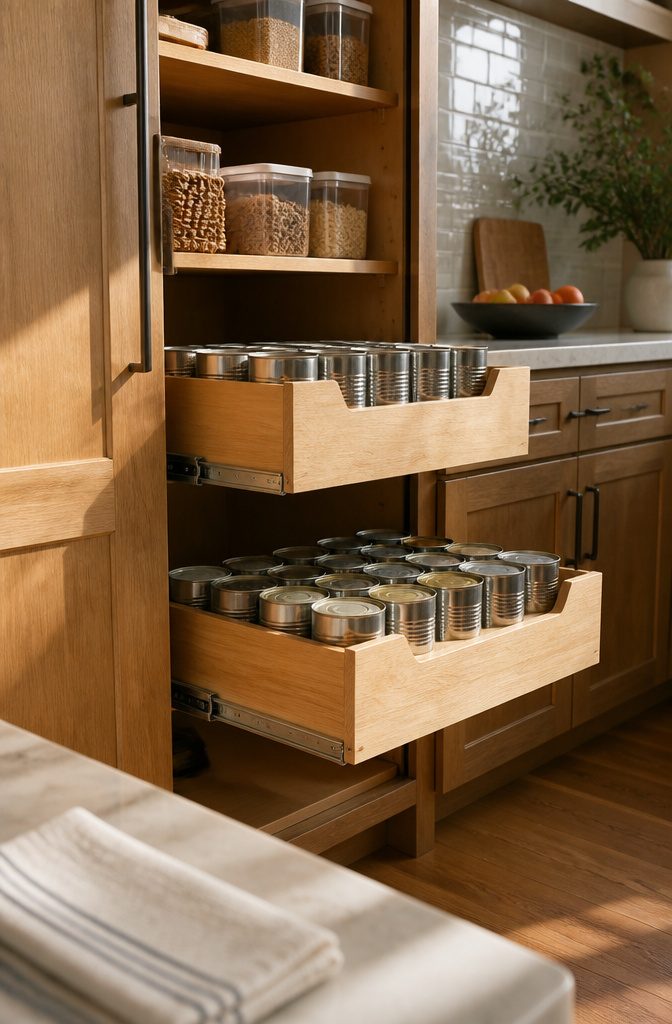
Deep cabinets waste their back half until something slides out.
In a 24-inch-deep cabinet, pull-out drawers on the lower level are the best place for heavy items like canned goods and broth, and you can measure the cartons first to set the drawer height.
For a budget route, the $10 Cabinet Roll-Outs project adds sliding boxes to cabinets you already own. An open-front bulk bin holds at least 3 dozen cans with every label visible.
Clear containers and baskets suit loose snacks and dry goods on upper shelves.
Pull-out hardware costs more than fixed shelves, and the slides take a little width from the opening. Spend on the lowest shelves and keep fixed shelving higher up.
Recommended Products

BPA Free Material: Our storage bins are made of premium BPA free, durable, shatter-resistant, clear plastic. Food Safe. These organizer bins are crystal clear, allows you to find the contents quickly.
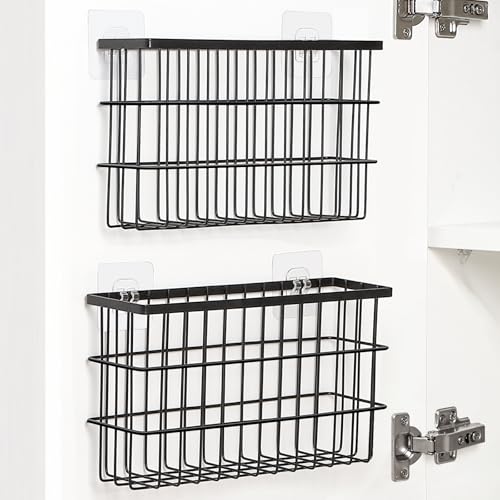
【Versatile Multi-use Storage Solution】Sinnsally cabinet door storage organizer is great for storing and organizing food container lids, tumbler lids, scrub brushes and other kitchen essentials. Ideal for small homes, bathroom, RVs, or apartments. It is a versatile storage solution that can be used in a variety of ways.
【Important Note】This kitchen cabinet organizer is designed for frameless cabinets only and will not fit cabinets with frames around the doors
4. Zones for Your Routines
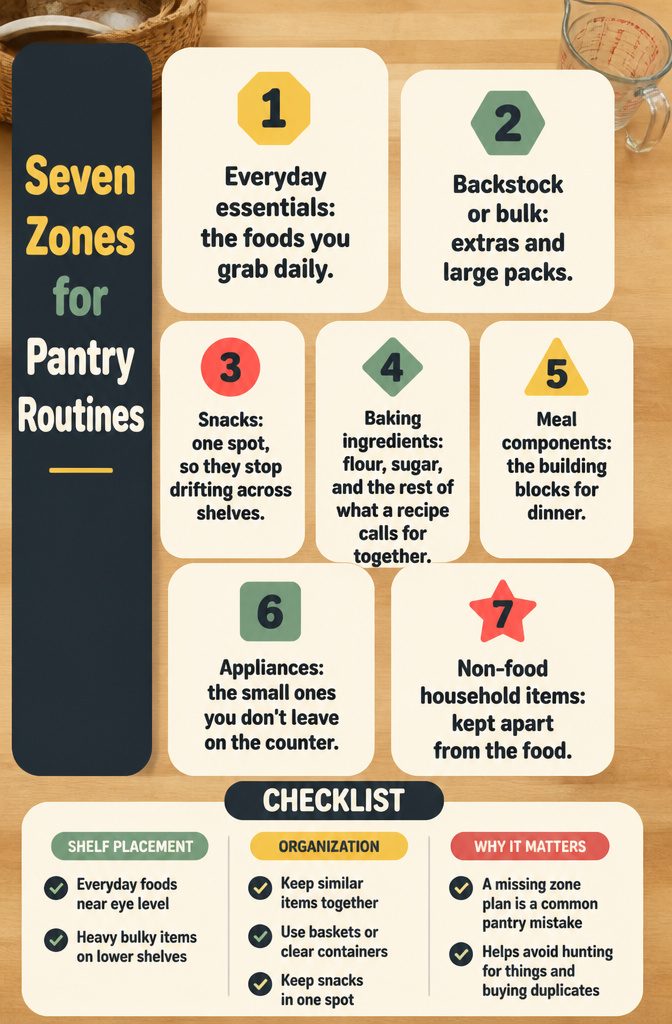
Group the pantry by how you use it, not by package type. These 7 zones mirror a normal week of cooking:
- Everyday essentials: the foods you grab daily.
- Backstock or bulk: extras and large packs.
- Snacks: one spot, so they stop drifting across shelves.
- Baking ingredients: flour, sugar, and the rest of what a recipe calls for together.
- Meal components: the building blocks for dinner.
- Appliances: the small ones you don’t leave on the counter.
- Non-food household items: kept apart from the food.
Within the zones, keep everyday foods near eye level and put heavy, bulky items on lower shelves. Keep similar items together, and use baskets or clear containers to corral small packages.
A missing zone plan is one of the most common pantry mistakes. Without it, you end up hunting for things and buying duplicates.
Recommended Products

USEFUL STORAGE - Smart size rack (L24" x W24" x H59") for home storage in narrow space or room corner to store odds and ends, perfect for use in kitchen, living room, bedroom, bathroom, laundry, office, etc.

Easy Installation: No tools required - simply stretch the shelf to the width of the cabinet. The shelf width can be adjusted to any size from 14 "to 25", including 14 inches, 15 inches, 16 inches, 17 inches, 18 inches, 19 inches, 20 inches, 21 inches, 22 inches, 23 inches, 24 inches, and 25 inches.(The shorter the size, the stronger the stability)

Two-Tier Cabinet Pullout Organizer: This pullout cabinet organizer system measures 23.75"W x 22"D x 19"H, with a frame height that adjusts from 16.25" to 19". It includes (2) sliding chrome steel wire baskets and mounting hardware.
5. Dedicated Storage for Specific Items
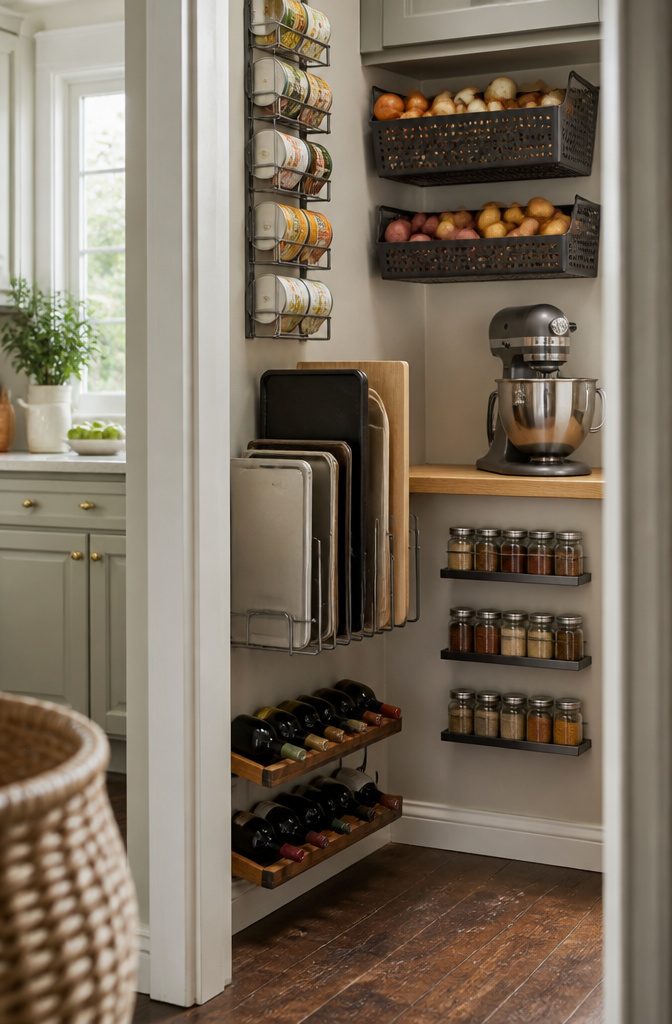
Give each category one fixed home so it stops spreading across shared shelves.
- Cans: A wall-mounted can organizer holds up to 32 cans in under 4 inches of wall depth, which suits a narrow wall or the back of a door.
- Affordable wall storage: The $70 Williams Sonoma Seville Classics UltraHD Pegboard Set puts hanging storage on a wall for a modest price.
- Trays and boards: Upright dividers hold baking sheets and cutting boards on edge, so you slide one out without lifting a stack.
- Wine: A rack keeps bottles on their sides in a low or corner spot you wouldn’t use for much else.
- Produce: Open or ventilated bins suit onions and potatoes.
- Spices: Shallow tiers or door-mounted racks keep every label visible.
- Appliances: Give the stand mixer a waist-height shelf so you never lift it from the floor.
Recommended Products

Make Storage More Simple — If you are struggling with your packets and want something to organize them, our food packet organizer bins will be a great choice for you. They are perfect for organizing snacks, spice packets, gravy packets, seasoning packets, tea packets, instant food packets, and other packets.

【Space Saving】The plastic storage drawers save space without taking up too much floor area. Designed to maximize storage under the walk-in closet, they feature smooth-glide drawers for easy access, allowing you to effortlessly slide them in and out. Perfect for organizing clothing, bedding, and out-of-season essentials.

【4PACK LINEN CLOSET STORAGE with SEE-THROUGH WINDOW】Each linen closet organizers and storage box features a clear window, allowing you to see the contents at a glance, making it super convenient to find what you need in no time.
6. Counter or Prep Space
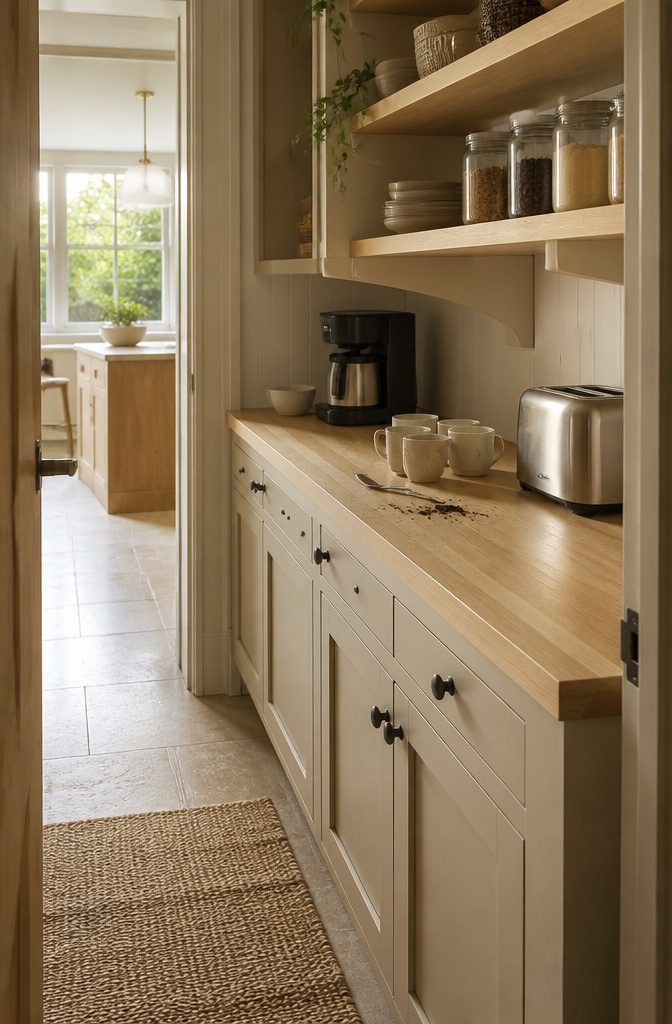
A pantry with a counter between the base cabinets and open upper shelves works as a second kitchen, with room for a toaster, microwave, coffee maker or light prep. That counter is what turns a storage closet into a workspace.
You have three surface choices.
Leftover Carrera marble matches the rest of the kitchen but costs about $1,500 to fabricate. Dark stone is the most forgiving, which matters at a coffee station because coffee is acidic and can mark marble.
Maple butcher block likely runs in the hundreds and can be cut to size on site, so butcher block is the budget pick.
It suits a toaster-and-mugs spot best, since it’s a warm wood tone you won’t be chopping on much.
Recommended Products

【Rust-Proof Stainless Steel】Our cabinet pull out shelves are built with premium, commercial-grade stainless steel, even hold up 60lbs. This material is not only exceptionally hard and rigid but also guarantees outstanding rust and corrosion resistance, ensuring the drawers look new and perform flawlessly for years to come, even in a humid kitchen or pantry environment.

Stackable Design for Space Optimization: The stackable design allows for maximizing space by creating vertical storage. It can be used individually or stacked together to save space on a vanity or bathroom cabinet, keeping items contained and organized
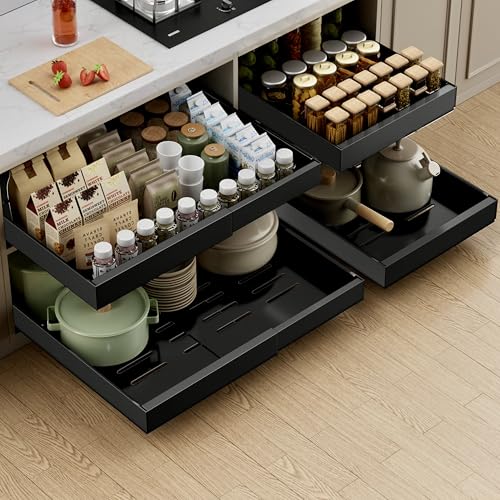
[🔝 WARM TIPS]: Please note that this pull out cabinet organizer suitable for cabinets with internal width exceeding 13" and depth exceeding 21". This pull out drawer for cabinets with Upgraded Raising Pads are compatible with both frameless cabinets and framed cabinets with edge heights up to 0.4 inches. It is essential to carefully measure your cabinet's dimensions before installation to ensure compatibility.
7. Lighting and Power
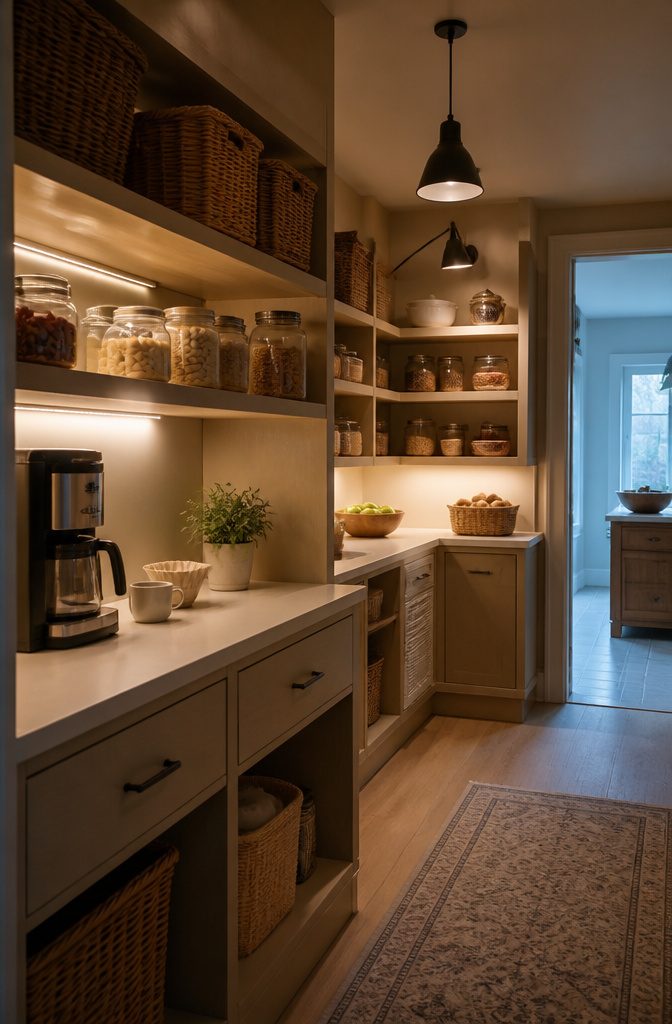
Poor lighting is one of the most common pantry mistakes, because a dim shelf hides what you own.
Warm white lighting recessed under open shelves lets you see everything clearly. Puck lights and shielded ribbon LEDs do the same job in a custom build.
In a walk-in, a pendant adds character, and a posable wall light reaches a back corner. Motion-sensor lighting is worth adding if your hands are usually full, since it turns on the moment you open the door.
Plan outlets before the walls close up. A coffee station or any appliance on the pantry counter needs its own plug points, and cord management built into the countertop keeps the cords out of sight.
Recommended Products

Set of 2 metal wire racks for kitchen and cabinet organization

PANTRY SHELF ORGANIZER, 2 PACK: Make better use of vertical space in cabinets, pantries and cupboards. These metal shelf risers keep cans, jars, boxes and dishes visible and within easy reach, helping crowded shelves stay neat and organized.

PANTRY SHELF ORGANIZER, 2 PACK: Make better use of vertical space in cabinets, pantries and cupboards. These metal shelf risers keep cans, jars, boxes and dishes visible and within easy reach, helping crowded shelves stay neat and organized.
8. Pantry Door Options
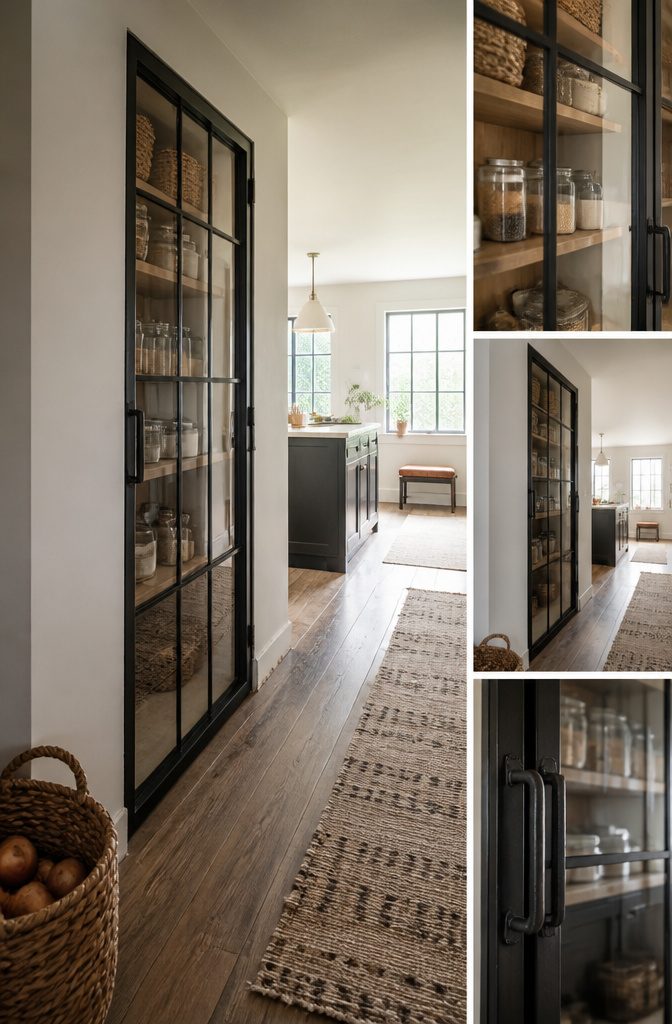
Glass doors suit a pantry you want seen. Steel-and-glass lets in natural light and works well in a narrow hallway, but everything on the shelves is on display, so only tidy jars and baskets belong behind it.
Doors that match your cabinet fronts hide the pantry completely, so it reads as ordinary upper and lower cabinets.
They’re the better pick for a mixed-up shelf of cereal boxes. A sliding or pocket door removes the swing, which helps where a hinged door would block a walkway, though it needs clear wall and hardware.
With no door, access is fastest and concealment is zero. In a small pantry, build shelving into the doors: one 96-inch pantry did exactly that.
Recommended Products

【Versatile Multi-use Storage Solution】Sinnsally cabinet door storage organizer is great for storing and organizing food container lids, tumbler lids, scrub brushes and other kitchen essentials. Ideal for small homes, bathroom, RVs, or apartments. It is a versatile storage solution that can be used in a variety of ways.
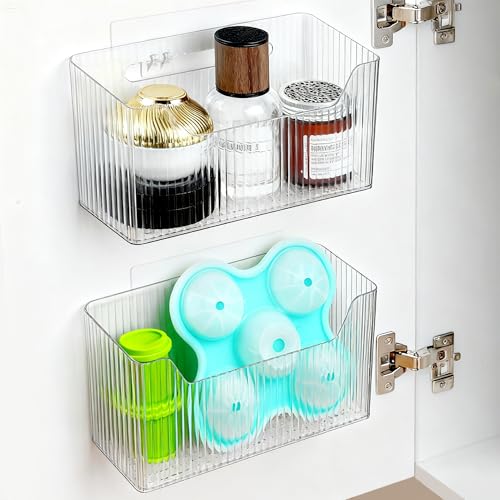
Designed for Inside Cabinet Door Storage: This cabinet door organizer is specially designed to hang inside cabinet doors, creating instant storage for bathroom or kitchen essentials. Keep items hidden yet easily accessible.

12 PACK CLEAR ORGANIZER BINS - Item includes 12 pcs plastic bins (9.6" L x 6.6" W x 4.1" H) & 12 pcs black labels. These clear organizer bins are made of thick clear plastic with smooth edges which are food grade and easy to clean. Check the dimensions first before ordering.
9. Finishes That Blend or Stand Out
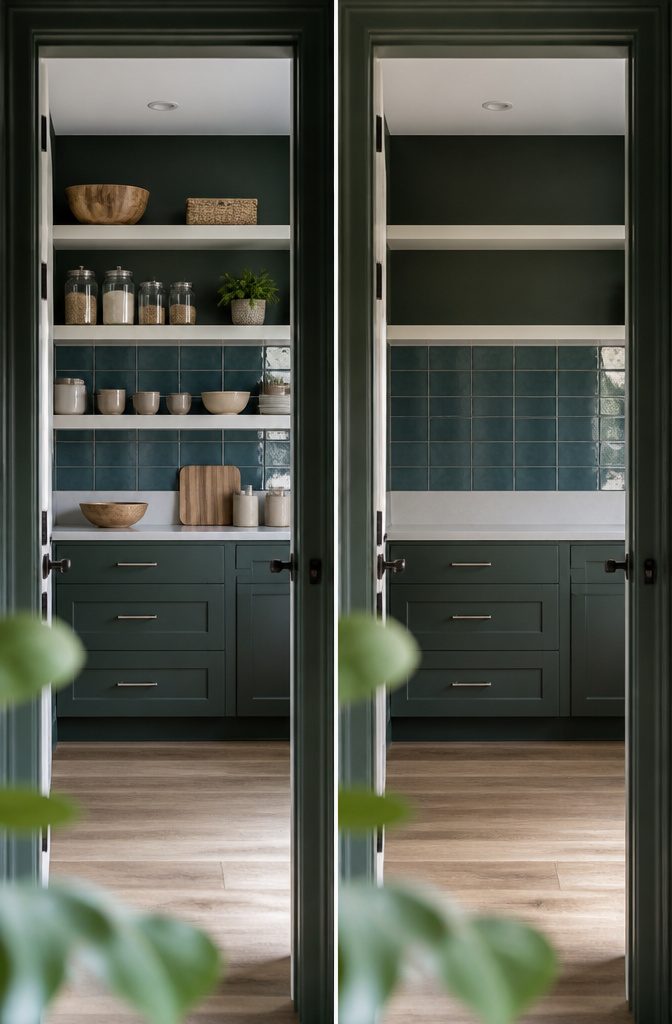
Matching the kitchen cabinets keeps a pantry quiet, while contrast gives it a personality of its own.
Paint and tile are the low-cost route. Benjamin Moore Deep Jungle on every surface, paired with White Dove floating shelves, looks deliberate rather than dark.
Sherwin-Williams Slate Tile, a deep blue, works on cabinetry in a satin finish. Glossy blue tile such as Zia Tile’s Ethereal Blue runs $3 and suits a backsplash behind open shelves.
Wallpaper is the splurge. Schumacher x Cabana Floralia Sisal costs $287, so it makes the most sense in a small pantry where a single wall carries the look.
Whichever finish you pick, keep the handles consistent with the kitchen so the room still reads as part of it.
Recommended Products

UPDATE & OPTIMIZE - A lot of customers who bought our 5 tier wire shelving rack want to make the rack wider and higher, so we have developed a new shelf which is 24 inches wide and 72 inches height and have 7 shelves, create a lot of storage space in kitchen, office, garage, bathroom and more.

【High Quality Steel Construction】Built with commercial-grade steel and reinforced wire grids, this 3-tier wire rack shelving supports 150 lbs per shelf (450 lbs total), ensuring exceptional strength and long-lasting stability. Its powder-coated finish adds reliable rust resistance making it suitable for indoor or covered outdoor use. Ideal for holding pantry items, kitchen appliances, garage tools, and everyday household storage

Tool-Free Boltless Assembly in Minutes: A snap-together boltless design lets you build the whole shelving unit fast, with no drill or hardware. Easy assembly is the number one thing our customers mention.
10. Awkward Corners and Gaps
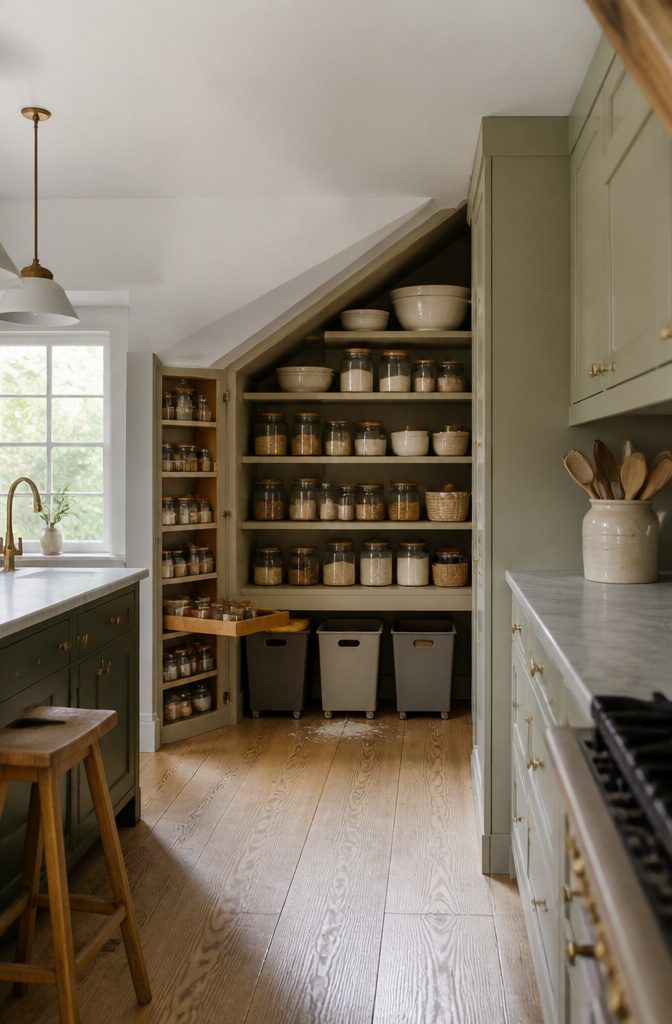
Store-bought shelves leave gaps around vents, outlets and windows, and custom-width shelves close those gaps.
Pieces cut to the nearest 16th of an inch can follow a sloped ceiling or step around a duct. Measure the width and height of each odd spot before you buy anything.
Corners work best with a LeMans or Lazy Susan, since a fixed shelf buries cans in the back. A narrow alcove suits pull-out shelving, and the strip between countertop and ceiling fits a tall cabinet.
Under low shelves, rolling bins hold bulky staples. If a required air duct shrinks the pantry, doors that match your cabinetry hide it and keep the kitchen looking uniform.
Recommended Products

10 Pack Clear Storage Bins: Item includes 4pcs large plastic bins (11.2" L x 8.1" W x 6" H) & 6pcs small storage bins (10.2" L x 4" W x 3" H). These clear organizer bins are great help to organize your food, snacks, medicine, cleaning tools, towels, RV, toys and books. Keep your shelves, countertop, drawer, refrigerator tidy and clean.

⭐️【Removable Partition Design】Storage containers feature 3 detachable dividers that allow you to freely create up to 4 customized sections in seconds. Perfect for organizing snacks, seasoning packets, beverage pods, and small ingredients – say goodbye to messy shelves.

SET OF 4 BINS — 2 LARGE + 2 SMALL — Includes 2 large bins for canned drinks, water bottles, cereal boxes, and pantry staples, plus 2 small bins for snack packets, spice jars, and condiments. Mix-size combo helps you organize different item types in one system. Please measure your shelf before ordering.
Measure and Take Inventory First
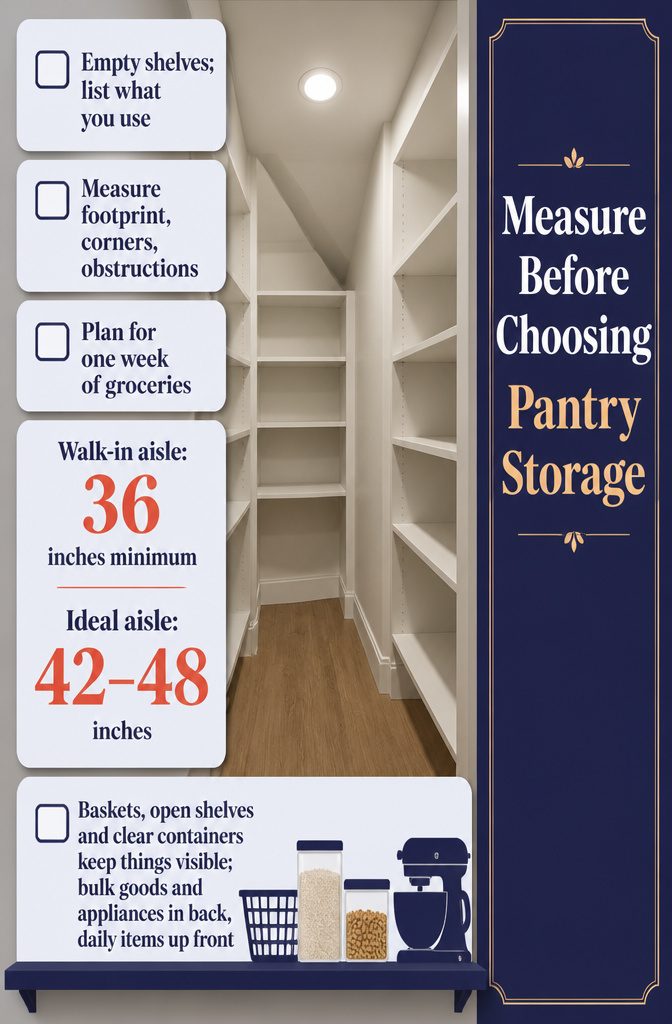
Plan around what you store and the floor space you have before you pick a layout.
- Empty the shelves and list what you actually use. Give everyday items the best spots first.
- Measure the footprint, including obstructions, tight corners and sloped ceilings.
- Size storage for at least a week of groceries.
- In a walk-in, leave an aisle of 36 inches at minimum, 42–48 inches ideal so two people can pass.
- Bigger pantries and deep storage hold more, but items vanish at the back. Baskets, open shelves and clear containers keep things visible, so put bulk goods and appliances in the deep spots and daily items where you can see them at a glance.
Keep It Within 4 Feet of Prep
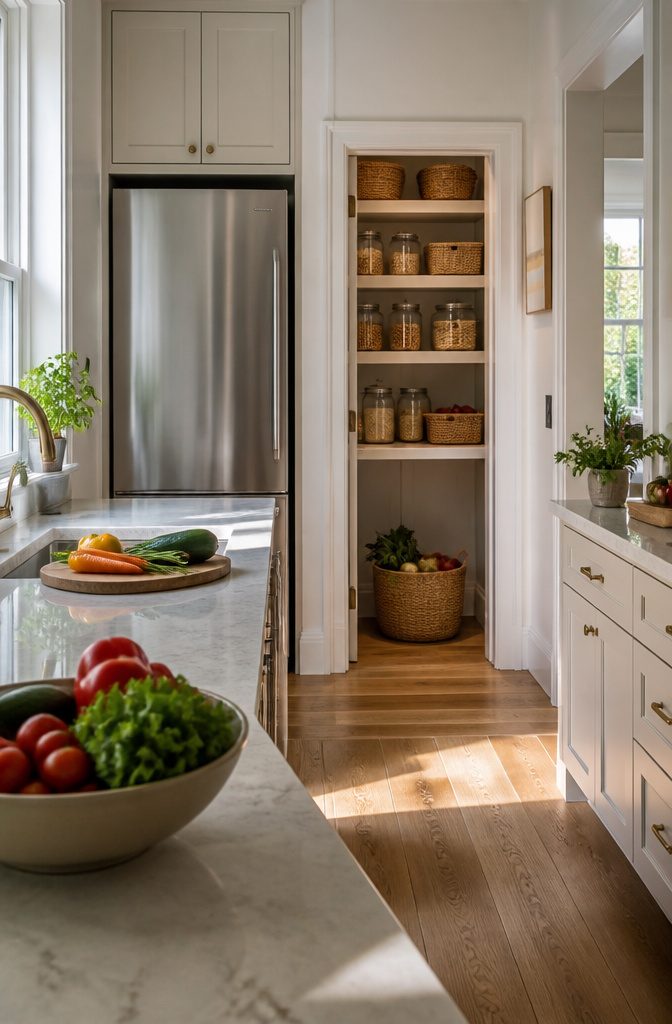
Place the pantry within 4 feet of your prep zone, so you can grab an ingredient without leaving your spot at the counter.
Put it near the refrigerator too, since most cooking pulls from both. A pantry beside the fridge saves you from crossing the kitchen with your hands full.
Grocery drop-off counts as much as cooking. A pantry close to the kitchen and the back door lets you carry bags in and shelve them in a few steps, instead of stacking them on the counter first.
If you’re choosing between a larger pantry down a hallway and a smaller one a step or two from the kitchen, the closer one gets used every day, and that’s the one that stays organized.
Rotate Stock With FIFO
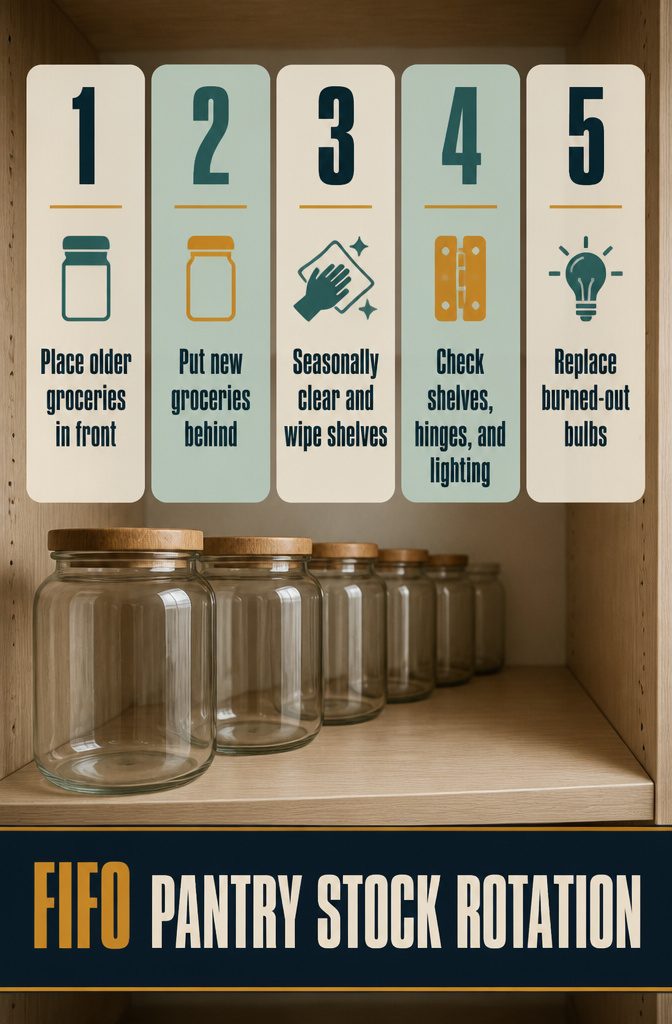
Dry goods get used before they expire when the pantry runs on FIFO, first in, first out.
- When you unpack groceries, put older items in front and new ones behind. It takes no extra time.
- Clean the pantry each season. Pull everything off the shelves, wipe them down, and toss expired goods that are taking up space.
- Use the same weekend to check shelves, hinges, and lighting for wear. A sagging shelf or a loose hinge is easier to fix before it fails.
- Replace burned-out bulbs and test any lighting that flickers.
Consistency matters more than effort. A quick rotation each time you restock beats a big overhaul once a year.
Frequently Asked Questions
What is the best way to organize kitchen pantry storage?
Group items by how you use them, not by package type.
Keep everyday foods near eye level, put heavy and bulky items on lower shelves, and use baskets or clear containers for small packages. A clear zone plan cuts down on hunting for things and buying duplicates.
How can I maximize storage in a small pantry?
Build up instead of back, and keep shelves shallow so one row holds everything in view.
Put shelving on the back of the door, and use a pull-out unit in a narrow alcove. A reach-in pantry 24–30 inches deep fits a small kitchen, though it fills up quickly.
Are pull-out shelves good for pantry storage?
Yes, especially in deep cabinets, where they bring items forward from the dead back half.
Put them on the lowest level for heavy goods like canned foods and broth. They cost more than fixed shelves and the slides take some width from the opening, so keep fixed shelving higher up.
How deep should pantry shelves be?
No deeper than 16 inches.
Use about 14 inches for easy reach, 10 inches for general storage, and 6 inches for cans and bottles. Save deeper shelves, low down, for baskets, bulk goods, and small appliances.
What should be stored in a kitchen pantry?
Dry and canned foods, snacks, bottles, baking ingredients, and small appliances.
A larger walk-in may also have room for cookware and serving pieces. Keep non-food household items in their own zone, apart from the food.
Is a walk-in pantry better than a pantry cabinet?
It depends on your space. A walk-in holds the most and offers the most ways to organize, but it needs a dedicated room and costs more to build or convert.
A pantry cabinet or reach-in gives up some capacity and fits small kitchens, so a walk-in is worth it only if you have the room and plan it carefully.
Are custom pantry cabinets worth the investment?
They pay off where standard shelves leave awkward gaps, since custom-width shelves can fit around vents, outlets, windows, and sloped ceilings.
Pull-out hardware costs more than fixed shelves. Spend on the lowest shelves and keep fixed shelving higher up to hold the cost down.
What are the latest trends in kitchen pantry design?
The trends listed by designers are walk-in layouts, concealed cupboards, integrated lighting, and layered shelving. Doors that match your cabinet fronts hide a pantry completely, and warm lighting under open shelves is a common built-in touch.
What are some common pantry mistakes?
Shelves that are too deep, poor lighting, and no zoning. Deep shelves let items disappear behind other items, dim shelves hide what you own, and without zones you end up searching and buying duplicates.
What are the 7 pantry zones?
Everyday essentials, backstock or bulk, snacks, baking ingredients, meal components, appliances, and non-food household items. They are based on how you cook in a normal week, so each category gets one fixed home.
What is the best layout for a pantry?
For a walk-in, galley and U-shaped layouts work best.
Leave an aisle at least 36 inches wide, with 42–48 inches ideal so two people can pass. Wherever the pantry sits, place it within 4 feet of your prep zone and near the refrigerator.
How can I design my own pantry?
Start by emptying the shelves and listing what you actually use, then measure the footprint, including obstructions, tight corners, and sloped ceilings.
Size storage for at least a week of groceries, choose a pantry type, and set up zones. Plan lighting and outlets before the walls close up.