
Room size decides the layout: a single wall suits a small apartment, a galley fits a narrow room, and an island or open plan needs floor to spare.
An island needs open space on every side, so in a small kitchen a peninsula fits better. Any layout works best with 4–9 feet on each side of the stove-sink-fridge triangle.
1. Single-Wall Kitchen
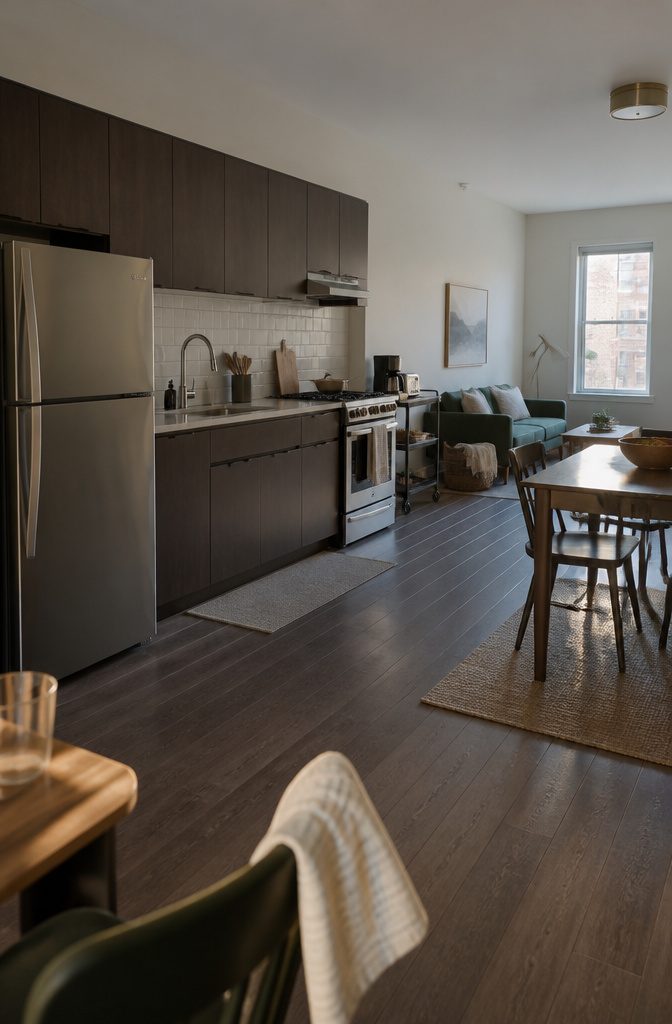
A single-wall kitchen runs the cabinets, countertops, and appliances along one wall and leaves the rest of the floor open.
It takes less floor space than any other layout, which is why it suits a small apartment where a second row of cabinets would pinch the walkway.
It also works in a larger open-plan room where the kitchen shares space with the dining area or living room.
Counter room is what you give up. With one run, the sink, stove, and prep area all share the same stretch, so your working counter is the strip between the sink and the stove.
Keep that strip clear. Move the toaster and coffee maker to a cart or shelf nearby.
Recommended Products

【Bamboo Mterial】The kitchen locker is crafted from bamboo, offering a modern and stylish look that complements various kitchen designs

COMPLETE 5-PIECE BRUSH SET FOR EVERY PAINTING TASK — Includes 1 Inch Flat, 1.5 Inch Angle, 2 Inch Flat, 2 Inch Angle Stubby, and 2.5 Inch Angle brush giving you every size professional painters use daily. Get all 5 for less than the price of a single brush from hardware store brands — professional grade performance at a fraction of the cost. Perfect for walls, trim, cabinets, doors, furniture, and detailed cutting-in work on any project.

COMPLETE 12-PC PROFESSIONAL SET:Includes 4" tray ×1, snap-fit handle ×1, reusable liners ×2, liner cover ×1, dual-brown microfiber sleeves ×4, white microfiber sleeves ×2, and 1.5" angled brush ×1. Perfect for walls, ceilings, trim, cabinets, and furniture
2. Galley Kitchen
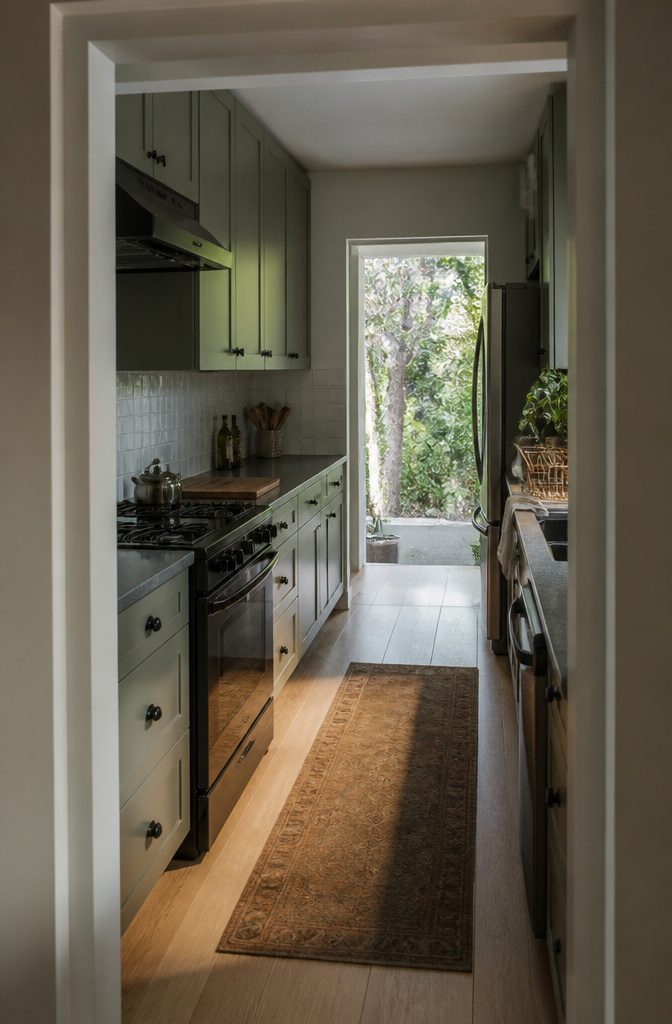
A galley kitchen puts two parallel runs of cabinets and countertops on either side of a walkway, which makes it the best fit for a narrow room.
Sink, stove, and refrigerator all sit within a turn or two of where you stand, so you cook without crossing open floor.
That short path is how the layout forms a working triangle: put the stove on one run and the sink and refrigerator on the other, and each point is a quick pivot from the next.
The weak spot is traffic.
If both ends of the galley are open, people will cut through it while you cook. Keep the walkway clear, and check that an open oven or dishwasher door doesn’t block the opposite run.
3. L-Shaped Kitchen
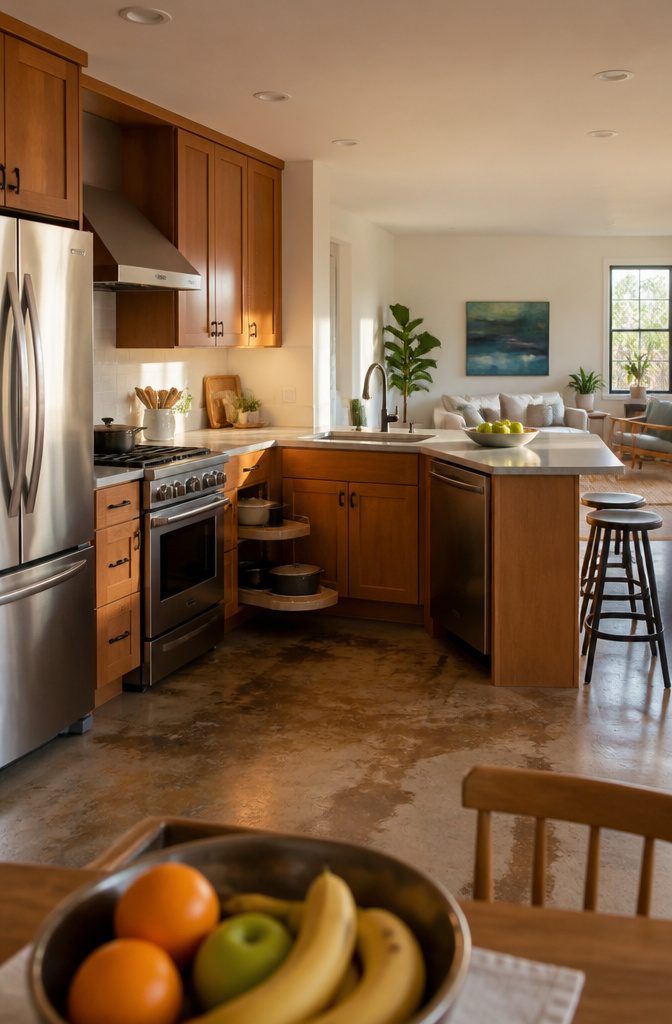
An L-shaped kitchen puts two countertop runs at a right angle, usually in a corner, and leaves the other two sides open.
Traffic can pass through without cutting across the cooking area, and the sink, stove, and fridge can sit on different legs with room to move between them.
It suits square or nearly square rooms and kitchens that open onto a dining or living area. A very narrow room fits a galley better, because the short leg of the L has nowhere to go.
For more counter space or a spot for stools, extend one leg into the room as a peninsula.
It needs clearance on only one side, unlike an island. The corner cabinet is the weak point, so add a pull-out shelf or lazy Susan.
4. U-Shaped Kitchen
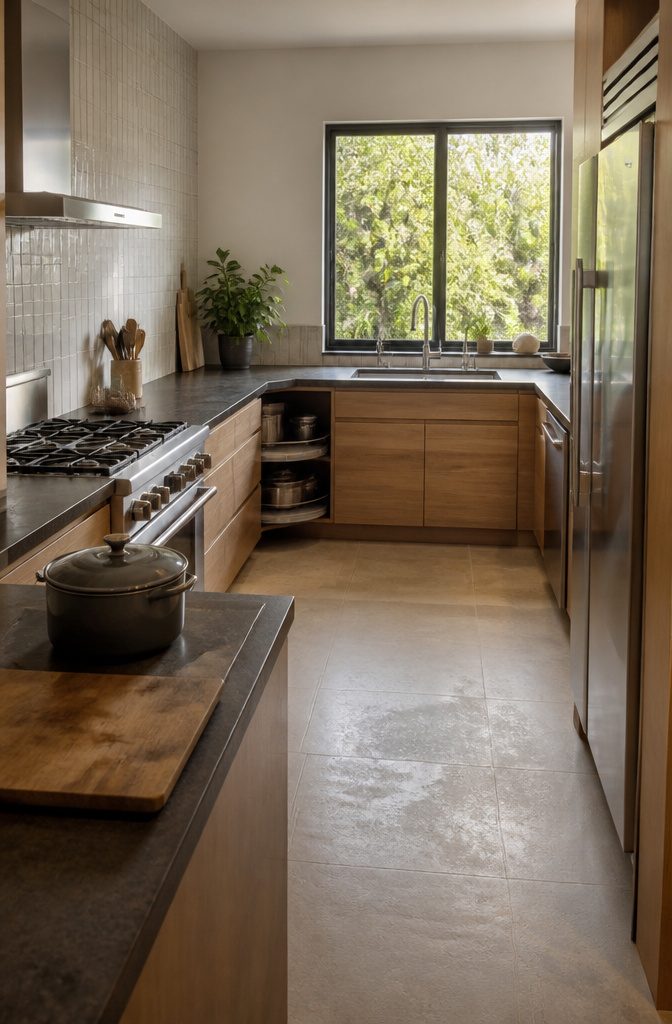
A U-shaped kitchen wraps counters and cabinets around three walls, which gives you plenty of work surface and storage with everything within arm’s reach.
Put the stove, sink, and refrigerator on different legs of the U and the work triangle builds itself.
Aim for 4–9 feet on each side of that triangle. If the room is narrow enough that the sides fall under 4 feet, you’ll be bumping into open doors and each other.
The two inside corners are the weak spot.
Deep base cabinets there swallow pots at the back, so budget for a lazy Susan or corner pull-out. In a small room, skip upper cabinets on one leg to keep it from feeling boxed in.
5. Peninsula Kitchen
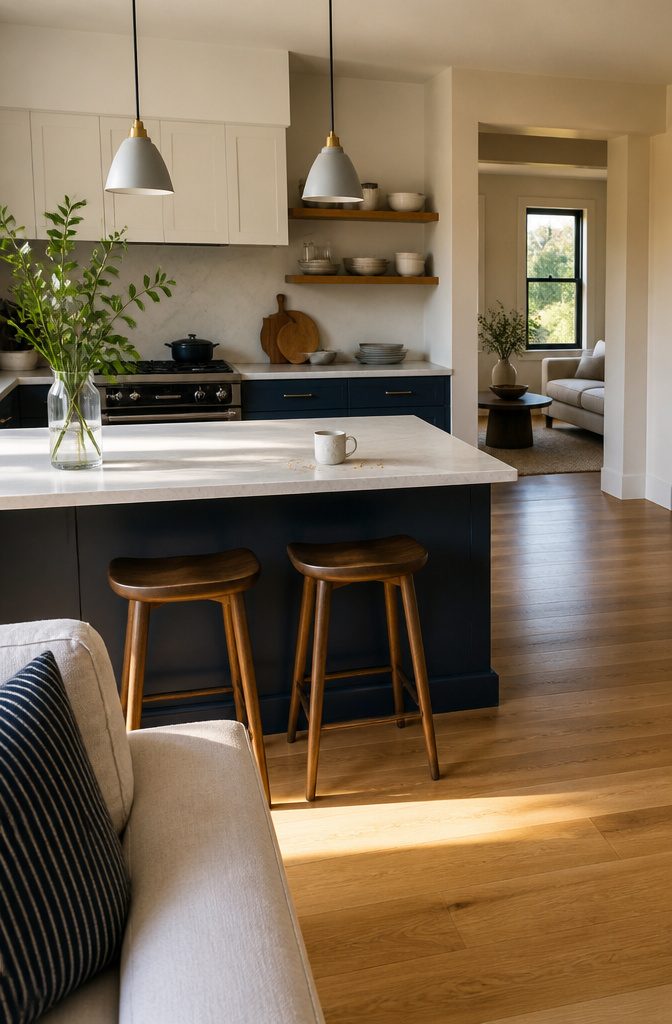
A peninsula is a counter attached at one end to a wall or cabinet run and open at the other, so it reads as a U-shape with one side left unbuilt.
The attached counter marks off the cooking area, which lets the cook work on one side while family or guests sit on the other.
Choose a peninsula over an island when the room is too small for a freestanding unit. You still get extra prep surface, and an overhang with a couple of stools turns it into a breakfast bar for casual meals.
In a small home, that bar can replace a dining table or double as a desk when you work from home.
6. Kitchen With an Island
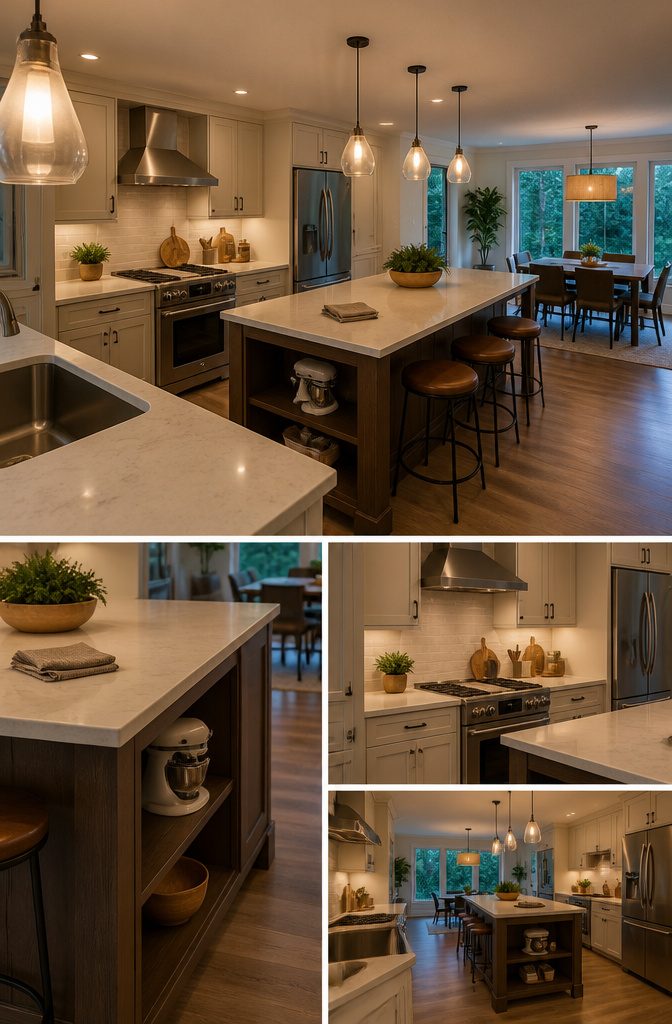
An island is a freestanding, counter-height unit set apart from the kitchen walls. The top gives you extra prep space, and cabinets or shelving underneath hold pots, small appliances, and the clutter that crowds your main counters.
Add stools on one side and it becomes the place where guests sit and kids do homework while you cook, which makes it the social center of the room.
Decide first whether it is for cooking, dining, or both, since that sets its shape and seating.
It needs open floor on every side, enough to walk around it with drawers and appliance doors open. In a small kitchen, skip it and consider a peninsula instead.
7. Kitchen With a Breakfast Bar
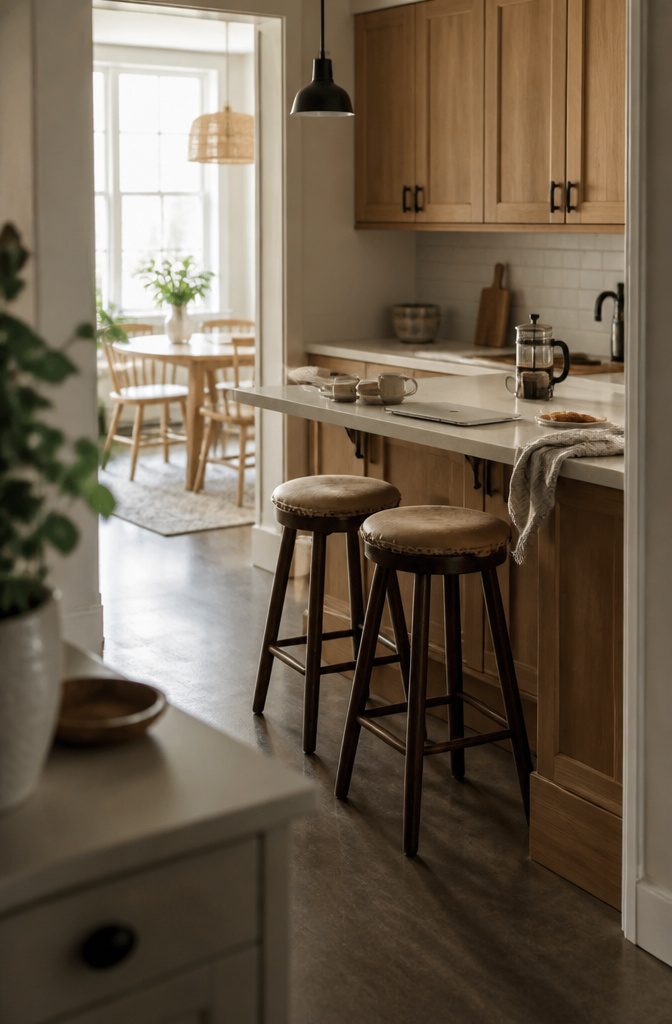
A breakfast bar is a stretch of countertop that extends past the cabinets, usually off an island or peninsula, so people can eat or talk while someone cooks. Unlike a dining table, it is built into the kitchen.
It adds worktop space for prep and needs no separate furniture, which makes it a practical stand-in for a table in a small home. It also works as a laptop spot if you work from home.
Expect a breakfast bar to suit quick meals, coffee, and conversation better than long sit-down dinners.
A table is more comfortable for a full meal with guests. If you add stools, leave enough room behind them for people to walk past.
8. Open-Plan Kitchen and Dining Room
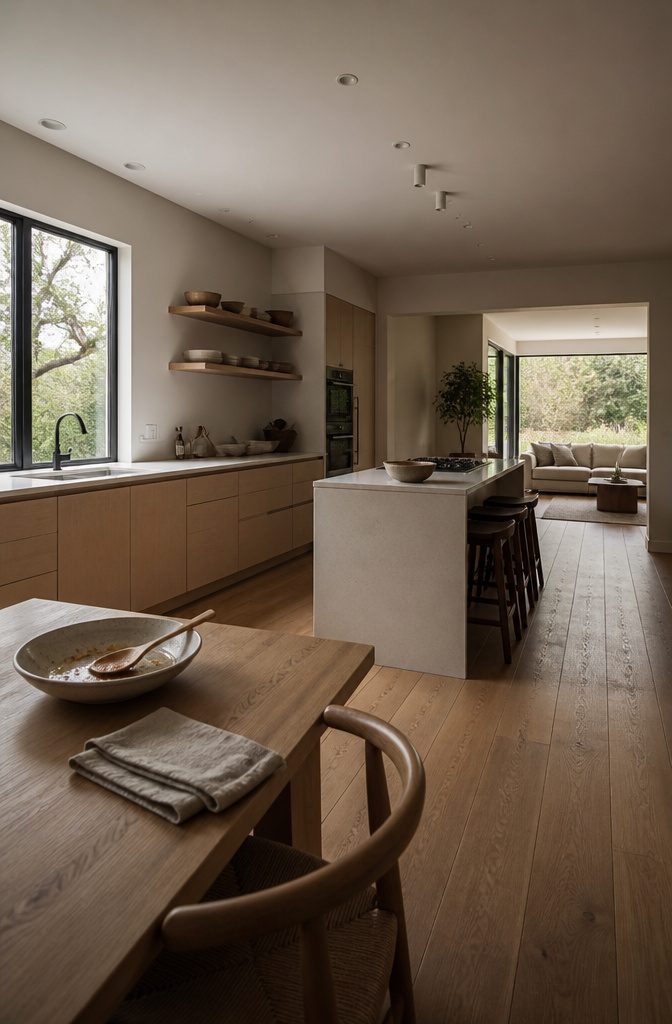
Open-plan kitchens put cooking and dining in one room, so the layout has to keep the cook connected to the table and the living area.
Run cabinets along one or two walls and leave the rest of the floor open. Everything stays within reach, and there’s room to move.
An island or peninsula then marks the cooking zone without closing it off. You can chat with guests or watch the kids while you prep.
Size the island to the room, because an oversized one crowds the walkway.
Decide whether it’s mainly for cooking, dining, or both, and add seating only if people can still pass behind it. Open shelving keeps everyday items close at hand and lets you display a few favorite pieces.
Match the Layout to Your Room
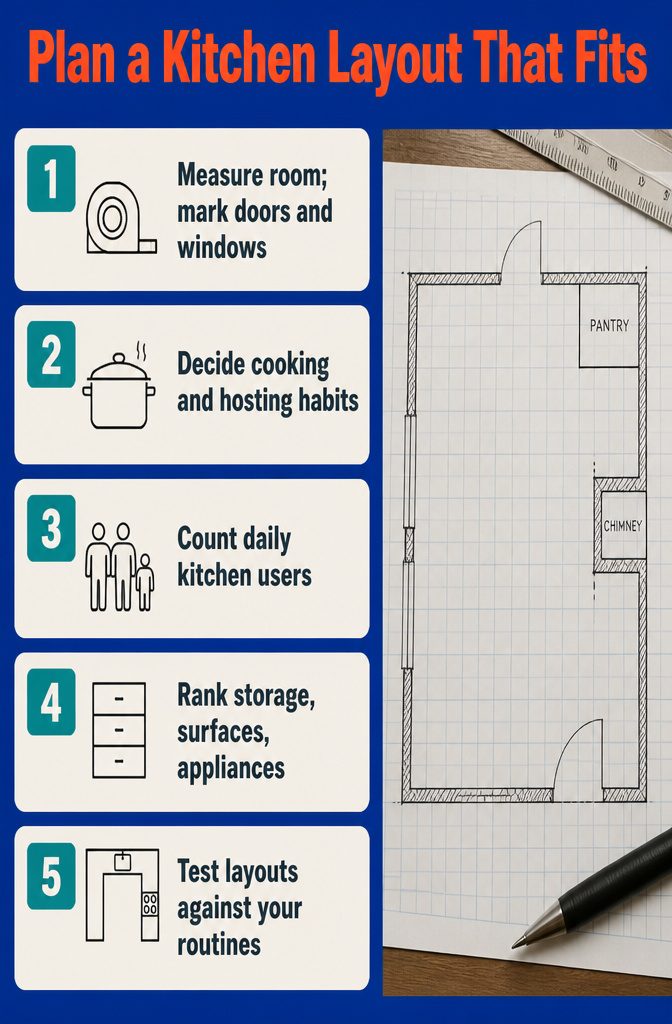
Measure first, then match your routines to the layouts.
- Measure the room and mark the doors, windows, and fixed features like a pantry or chimney. Draw those on your plan before comparing layouts, since they limit which walls can hold cabinets.
- Decide how often you cook and whether you host large gatherings or keep to small family dinners.
- Count who uses the kitchen daily. Kids or a second cook change how much open floor you need.
- Write a wish list of storage, work surfaces, and appliances, then rank it.
- Test L-shaped, U-shaped, and other layouts against that list. Pick the one that best supports how you move between prep, cooking, and storing.
Work Triangle and 3×4 Rule
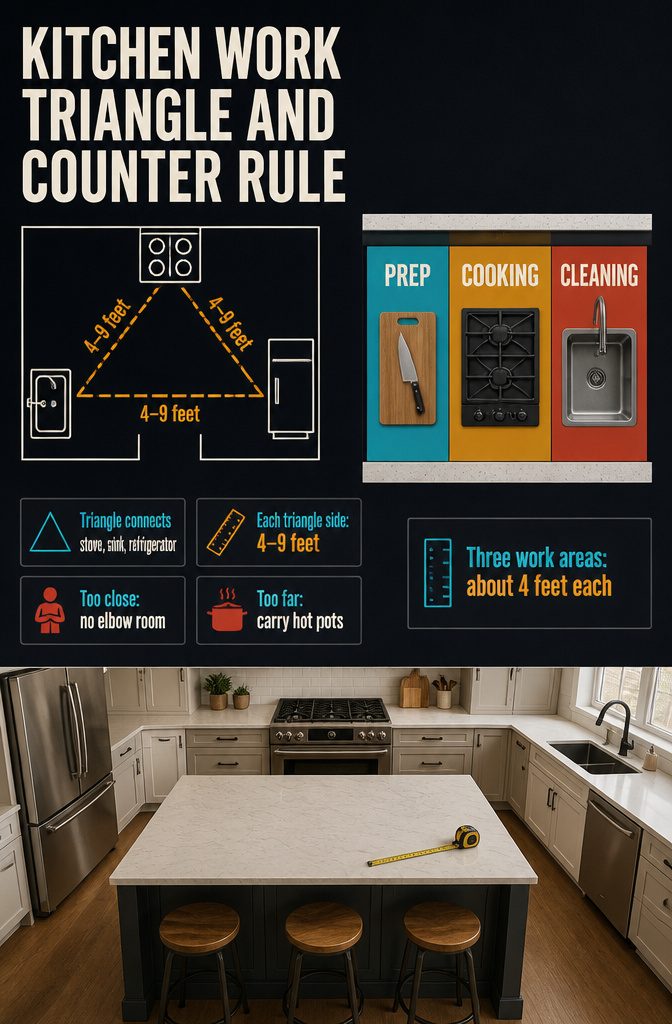
The work triangle links the stove, sink, and refrigerator, the 3 spots you use most while cooking.
Each side of the triangle should measure 4–9 feet. Much closer and the cook has no elbow room; much farther and you carry hot pots across the room.
The 3×4 rule covers counter space: 3 work areas of about 4 feet each, one for prep, one for cooking, and one for cleaning. Giving each task its own stretch keeps dirty dishes off the cutting board.
An island layout is where both rules get tested.
Set the refrigerator, sink, and stove in a triangle, and leave enough room between counters that the island doesn’t crowd your walking path. Measure the 3 sides with a tape before you commit.
Frequently Asked Questions
What is the golden rule for kitchen layout design?
The work triangle: place the stove, sink, and refrigerator so each side of the triangle between them measures 4–9 feet. Closer than 4 feet crowds the cook, and farther than 9 feet means extra steps with hot pots in hand.
What is the 3×4 kitchen rule?
The 3×4 rule calls for 3 work areas of about 4 feet each, one for prep, one for cooking, and one for cleaning. Giving each task its own stretch of counter keeps dirty dishes away from the food you are preparing.
What is the best layout for an open kitchen?
Run the cabinets along 1 or 2 walls and leave the rest of the floor open, then add an island or peninsula to mark the cooking zone.
This keeps the cook connected to the dining and living areas. Size the island to the room, and add seating only if people can still walk behind it.
How can I design my kitchen layout?
Measure the room first and mark the doors, windows, and fixed features such as a pantry or chimney.
Then list how often you cook, who uses the kitchen daily, and the storage, work surfaces, and appliances you want, and test each layout against that list.
Pick the one that best supports how you move between prep, cooking, and storage.
What are the most popular kitchen layouts?
Single-wall, galley, L-shaped, U-shaped, peninsula, and island kitchens are the 6 layouts most often listed as popular.
Galley and U-shaped are named as especially common. A breakfast bar and an open-plan kitchen and dining room are 2 further options.