
Ideas here run from 16-ounce soap pumps to removing a wall, and your layout decides where you land.
If it works, spend on surfaces; if it fights you, surfaces won’t fix it. A load-bearing wall can still come out if something carries the load, as three columns did in a 1928 San Francisco kitchen.
1. Open the Wall
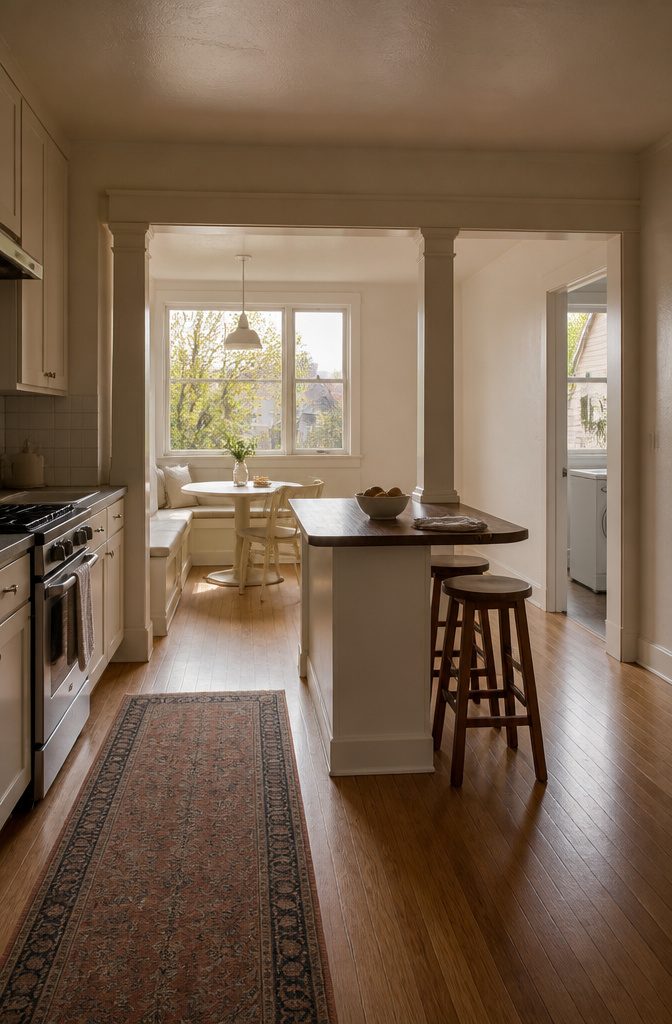
Taking out a wall is the costliest, longest-running change on this list, and it buys the most: better flow, more light, more seating and more cooking room.
In one 1928 San Francisco kitchen, removing the wall to a breakfast nook and a sliver of wall by the laundry created a continuous galley with a peninsula and two stools.
Absorbing a pantry, mudroom and closet along one short wall added 91 square feet of floor.
Before any demolition, confirm whether the wall is load-bearing.
A structural wall can still come out, but something has to carry the load. That kitchen used three support columns, and the breakfast bar was built between two of them.
Recommended Products
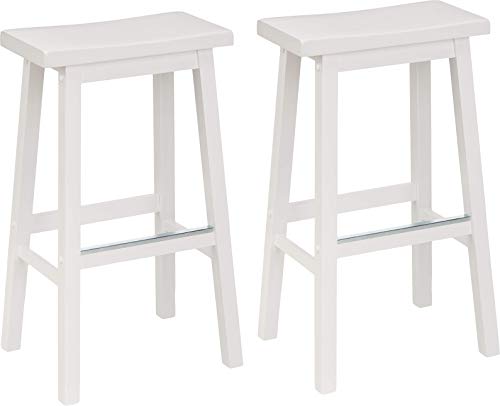
Barstool (set of 2) for a kitchen island, home bar, or casual extra seating; can be easily carried from room to room

Water Resistant and Cozy: Each bar stool comes with a soft saddle seat and footrests, having you enjoy a more comfortable and relaxed sitting experience. Water resistant function make the barstools quite easy to clean. Non-slipped foot pads of the kitchen stool protect the floor from being scratched.

Durable & Sturdy Construction: Built to withstand daily use, our industrial-style bar stool combines a robust metal frame and a PU-cushioned seat. Supporting up to 250 lbs, it features four non-slip foot pads to protect your floors while keeping you steady.
2. Keep the Footprint
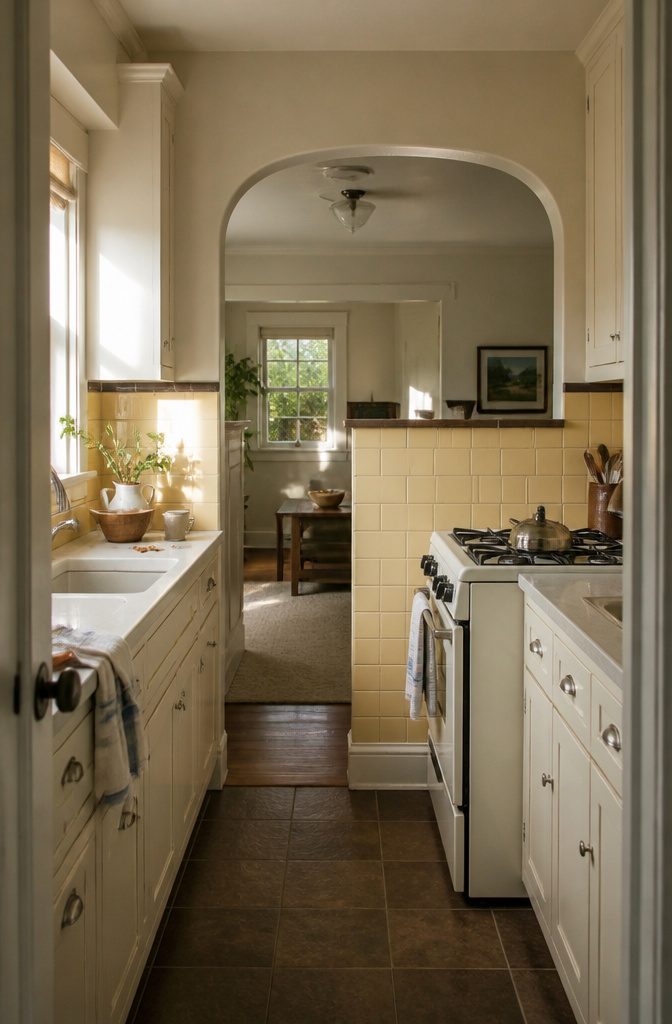
A kitchen about 9 feet square in a 1930 bungalow kept its footprint and still gained several feet of counter.
The owner gutted the dark tile left by a 1980s update, removed doors, scaled down the appliances, and replaced the solid wall behind the stove with a half-wall and arch. Cream cabinets and butter-yellow tile finished it.
A 13½-by-19-foot kitchen got barn-red cabinets and walnut and marble counters without moving a wall, the island, the cooktop, the wall ovens, or the sink.
Leaving the sink, cooktop, and walls in place avoids relocation work and puts the money into surfaces you see daily. It cannot fix a layout that fights you.
Recommended Products

Solid wood top for increased durability and longevity contrasts with the clean white finish seamlessly; 50lbs (shelf); 5lbs (drawer); Assembly Required Yes; Capacity 100lbs (top); Warranty 30 days limited; Construction Material Solid wood; Country Of Origin Thailand; Dimensions 20D x 40W x 36.5H

STAINLESS STEEL HONEYCOMB TEXTURE & 16-GAUGE T304 STEEL: Crafted from heavy-duty 16-gauge T304 stainless steel with an advanced embossed Stainless Steel Honeycomb finish. This texture is specifically engineered to hide scratches and repel water like a lotus leaf, ensuring superior rust resistance and a long-lasting, commercial-grade appearance compared to standard satin finish sinks.

Effortless Food Prep: The stainless steel countertop of this kitchen island on wheels provides a smooth and safe surface for all your chopping and cutting tasks. Cleanup is a breeze, as a simple wipe with a kitchen towel or cloth leaves it spotless and ready for your next culinary adventure
3. Work Zones
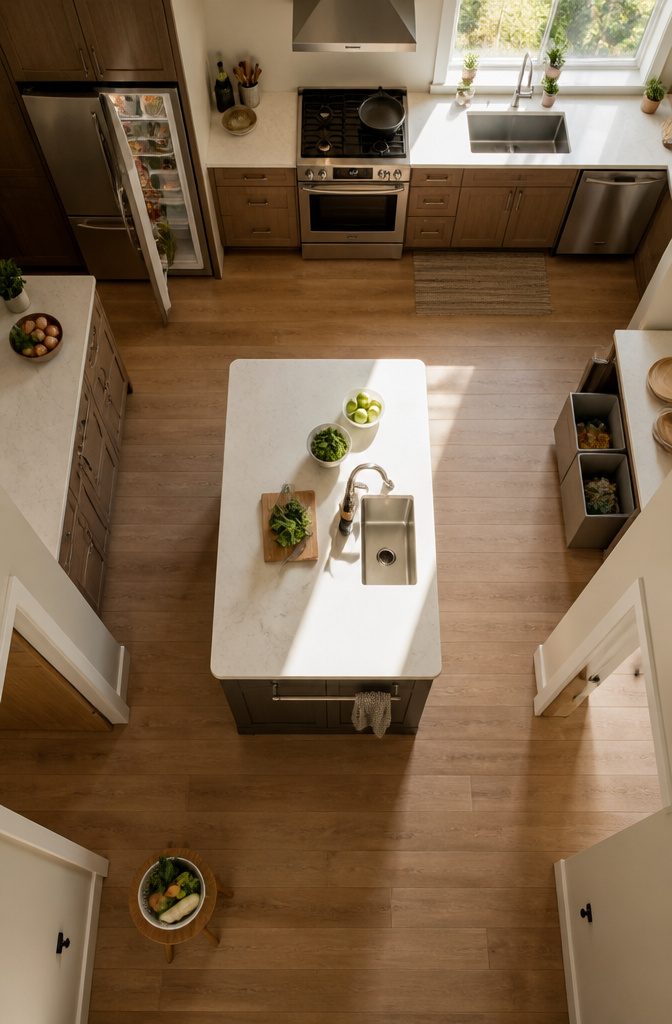
Divide the room by task.
The refrigerator and pantry form the food storage zone. Prep gets the cutting area, mixing space, oven, and a prep sink.
The cooktop and hood make up the cooking zone. Cleanup holds the main sink, dishwasher, trash and compost bins, and cleaning supplies.
A room with three doorways and a big window can force everything onto one wall. Removing a short peninsula and a table that blocked the window made space for an island with a prep sink, under-counter storage, and bar stools.
Check the island against the refrigerator before you commit. Open the door fully and make sure someone can still pass.
A common rule of thumb is 42–48 inches of aisle where people work. Tape the island’s outline on the floor first.
Recommended Products

Dimensions: 36 x 28 x 15 CM / 14.2 x 11 x 5.9 IN

ORGANIZE AND SAVE SPACE - The wall-mounted mop and broom holder offers easy access to store and grab brooms, dustpans, and mops while freeing up closet space. Keep your cleaning tools organized and within reach.

SOLVE YOUR STORAGE NEEDS WITH STYLE – This double-door storage cabinet offers four adjustable shelves, providing customizable storage options for your home office, pantry, or craft room
4. Paint the Cabinets
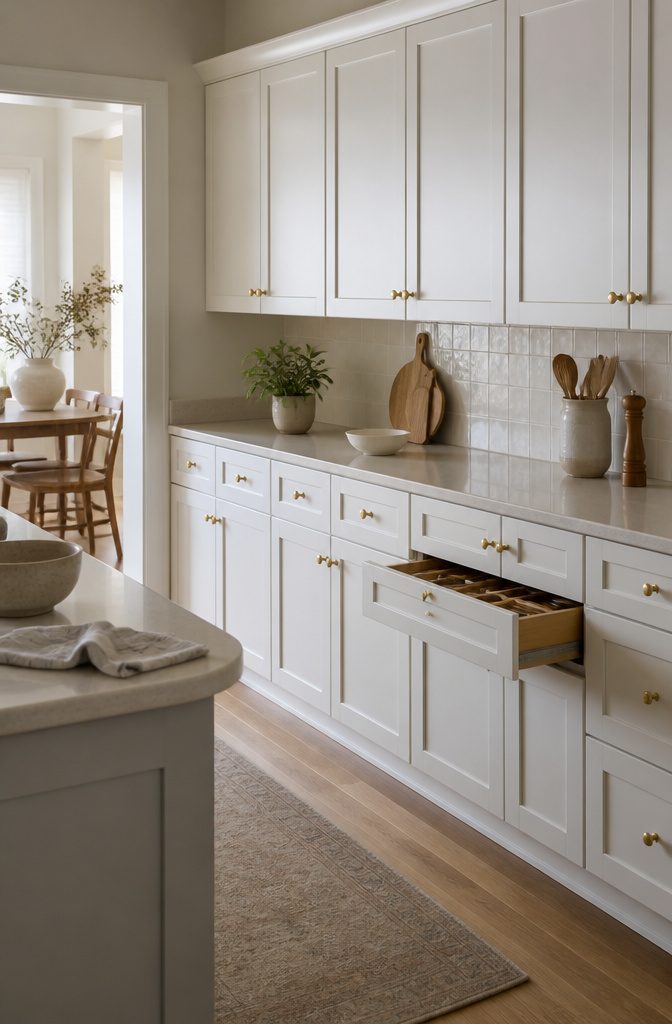
Yellowed trim or worn stain doesn’t mean the cabinets have to go. Take the doors off and lightly sand the frames with 220-grit sandpaper.
Wipe off the dust with a towel, then a tack cloth, and prime with a bonding primer made to stick to almost any surface. Once it dries, sand very lightly again.
Paint with Benjamin Moore Advance in Simply White, satin finish, two coats. That white clears up yellowed trim and matches white doors.
Prep and drying take the most time, not painting: dust removal, primer dry time, and the wait before each recoat.
Finish with knobs in size 1 5/16 in Golden Champagne. Swapping them takes minutes and adds a warm metal note against the white.
Recommended Products

Easy to Use: Even for beginners, this primer is easy to use! Just brush it on and let it dry.

Easy to Use: Even for beginners, this primer is easy to use! Just brush it on and let it dry.

Specifically formulated to meet the performance needs of body shop personnel
5. Backsplash
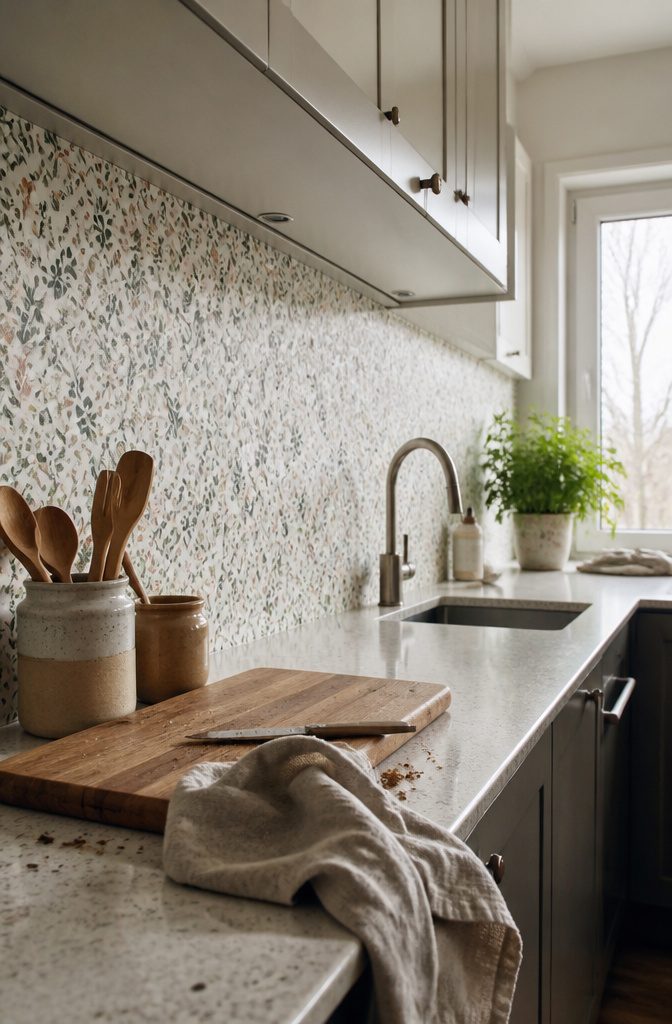
Depending on roll size and pattern repeat, a single roll of wallpaper is often enough for a backsplash, whether you stop at the strip under the cabinets or run it to the ceiling. Splatter is its weak spot.
Seal it with a dead flat varnish, which guards against water and food with virtually no change in color or sheen. Behind a stove that sees a lot of frying, tile is the safer surface.
For a renter or a weekend job, tile stickers win. They go on drywall or straight over old tile, so nothing gets demolished.
Peel-and-stick subway tile sheets work on bare walls. Painting dated ceramic tile costs the least, but it is harder to undo than stickers.
Recommended Products

[Curved Design]: This ergonomic saddle stool adopts curved panel design, it can reduce your fatigue caused by busy life easily and provide you with additional comfort without tiredness. Each chair sizes 11.8"L x 15.4"W x 23.6"H

Fashionable, Modern and Ergonomic Design: This ergonomic saddle stool adopts curved panel design, which can effectively relieve your fatigue. When you need to sit for a long time, it can disperse the efforts of your legs, gently support your hips, and provide you with additional comfort without tiredness
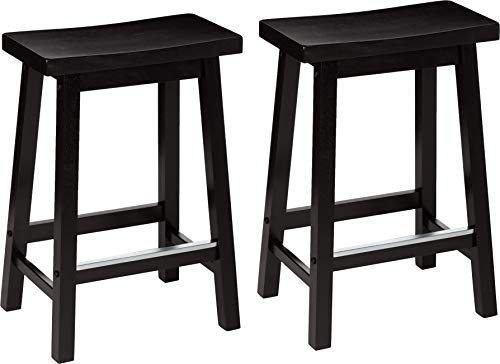
SOLID CONSTRUCTION: Amazon Basics counter-height stool set of 2 made from sturdy solid wood frame with Black finish & A-frame design with square legs for stability
6. New Countertops
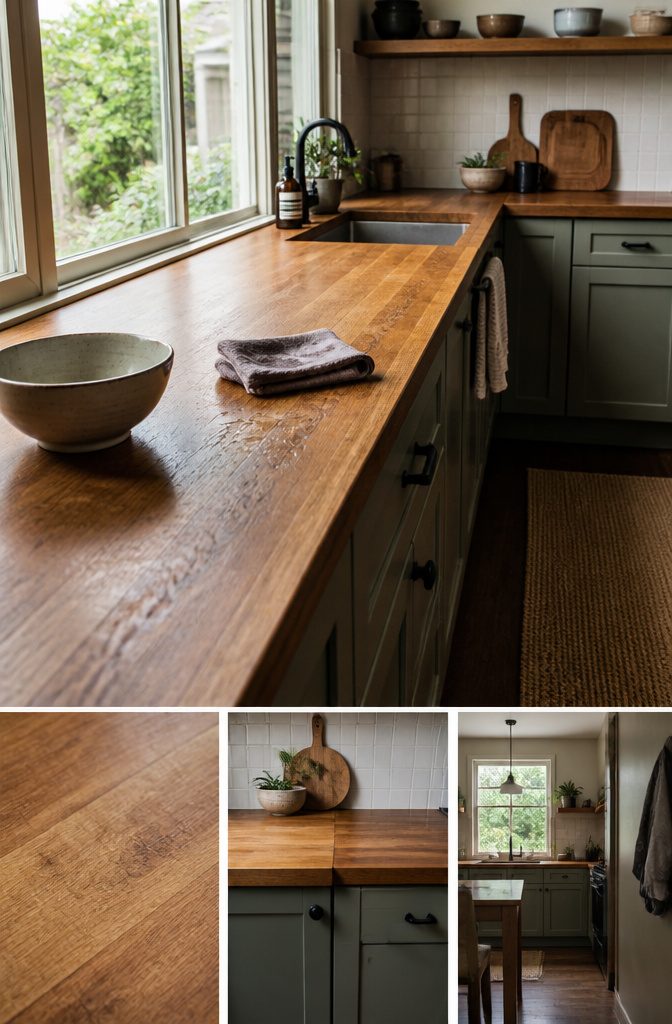
Peel-and-stick marble-pattern paper made for kitchens and bathrooms is water resistant and covers worn laminate, so it is the best move for renters and tight budgets. If you plan to stay, pick a real material:
- Laminate: inexpensive, comes in many colors.
- Wood: durable and convenient, fairly expensive.
- Granite: premium natural stone, durable, expensive.
- Quartz: manmade stone, and the better long-term buy over granite.
- Marble: expensive, adds real estate value.
- Soapstone: deep, rich color that may change over time.
- Limestone: many variations and relatively affordable, but seams are a weak spot.
- Ceramic tile: affordable, with visible grout lines.
- Steel and concrete: skip them unless that specific look is the goal.
Recommended Products

[Convenient Power Strip] This baker's rack features a built-in power strip with 3 AC outlets, a safety switch, and a maximum power capacity of 1875 watts. It's perfect for powering multiple appliances at once

Food Prep: The stainless steel countertop provides a smooth and safe surface to do all of your food preparation for chopping or cutting while being easy to clean with just a wipe of a kitchen towel or cloth.

Effortless Food Prep: The stainless steel countertop of this kitchen island on wheels provides a smooth and safe surface for all your chopping and cutting tasks. Cleanup is a breeze, as a simple wipe with a kitchen towel or cloth leaves it spotless and ready for your next culinary adventure
7. Lighting
Yellowed recessed-light trim makes a kitchen look dated, and paint is the cheapest fix. Pop the trim off, spray it white with high-heat spray paint, and reinstall it the next day.
Two coats from a single can covers 14 lights. If you’d rather not spray, a 12-pack of baffle trim fits standard 6-inch recessed cans.
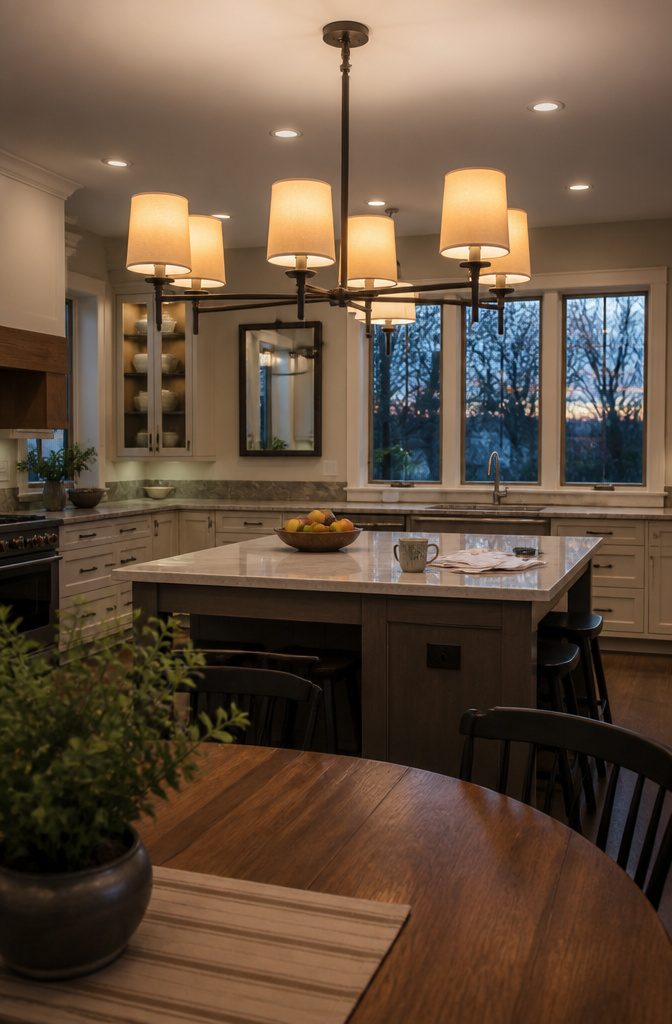
Most kitchens have only a pendant or two, so swapping the one over the island changes the room fast. A 6-light chandelier with a shade works well there, and eBay and Facebook Marketplace are good places to find lower-priced fixtures.
Mirrors bounce light around the room, and leaving windows uncovered adds more. Lighting inside cabinets, or glass doors that let light in, brightens the corners the ceiling lights miss.
Recommended Products

ELEVATE YOUR SPACE – Finished in Soft White, this elegant storage cabinet enhances your home decor while providing ample storage solutions for kitchen supplies and office essentials

SOLVE YOUR STORAGE CHALLENGES – This storage cabinet provides a sleek solution to your clutter, offering ample space for all your essentials while enhancing your home’s aesthetic

Handwoven Craftsmanship: Handwoven by skilled artisans with tight, even braiding, each pantry basket offers a neat, elegant look that showcases its high-quality craftsmanship.
8. Cabinet Storage
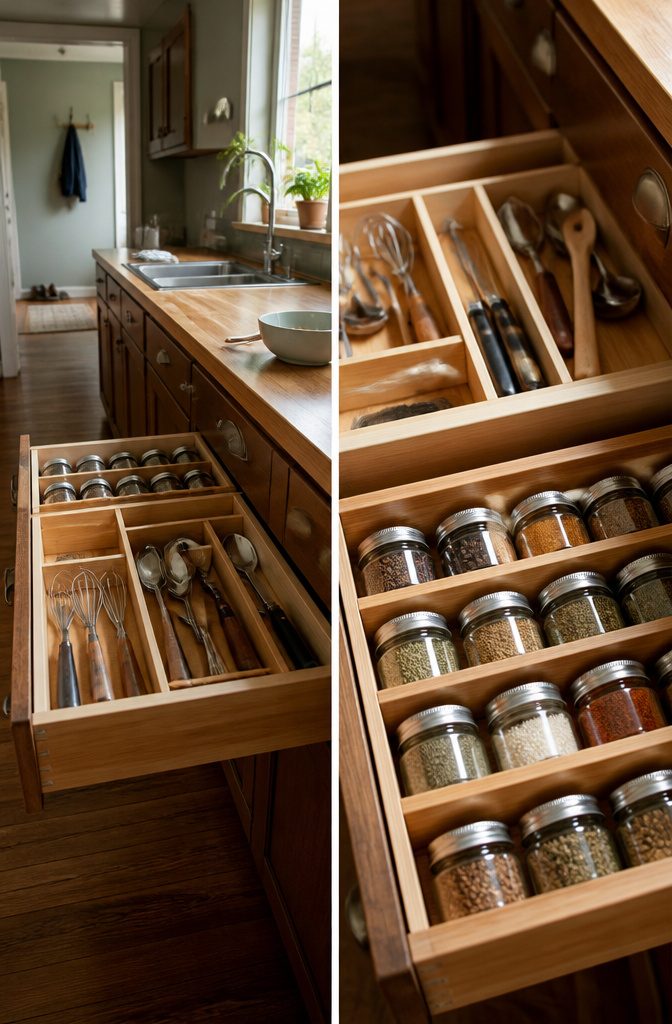
Cabinets installed 20+ years ago usually lack interior organizers, and adding them yourself is the cheapest storage gain in a kitchen.
Expandable bamboo dividers keep utensils sorted, and a wood spice organizer fits in a drawer. Both cost you only a little drawer depth.
For more room, hide storage in the wall. Folding wood pocket doors conceal a pantry or appliance nook without swinging into the aisle, though they need a wall cavity deep enough to hold them.
A mud zone by the entry keeps shoes and bags out of the cooking area, and it costs floor space.
If the floor will change later, build toekicks 1 inch higher than normal so wood or tile fits beneath. Two 16-ounce soap pumps in one tray keep the sink area tidy.
Recommended Products

BY REFINISHING PROS SINCE 1972 - Five decades of professional surface refinishing experience in every jar. While other cabinet paint brands started in marketing departments, Bathworks started in bathrooms, kitchens, and workshops - and we are still refinishing surfaces professionally today.

Product 1: Premium-quality, acrylic-urethane bonding primer-sealer with unparalleled adhesion to the most challenging surfaces, including glossy tile, PVC, vinyl, plastic, glass, glazed block, glossy paint, pre-coated siding, fiberglass, and galvanized metals.
9. Faucet and Sink
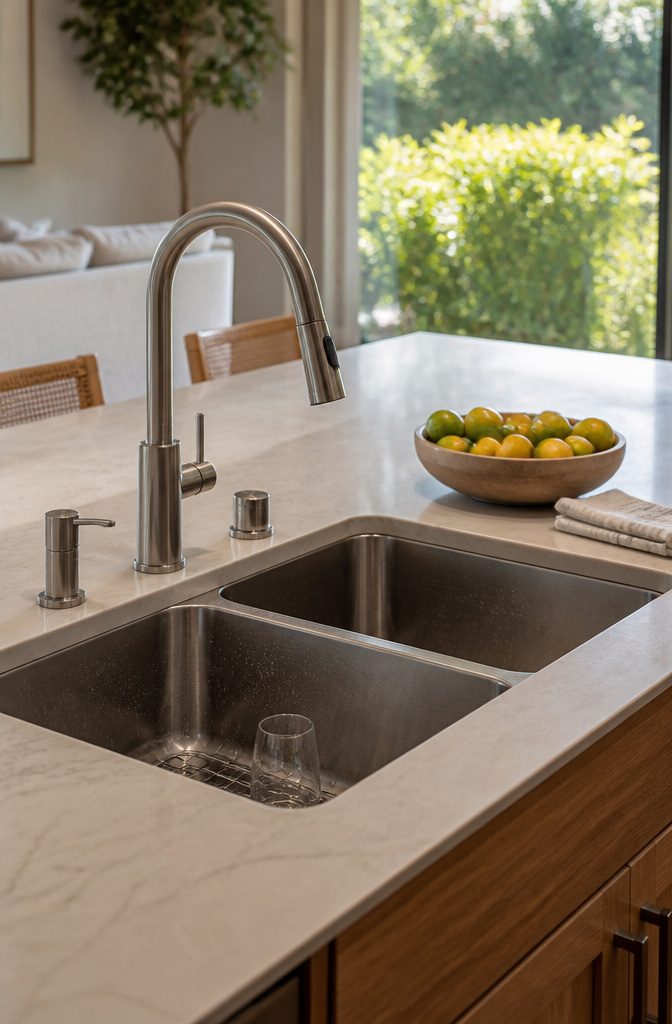
A new faucet is the cheapest change that alters how the kitchen works, and it is a weekend job.
Touch-activated models cost less than they used to, and a touchless faucet is the minimum worth buying. Look for a pull-down spray with several functions, plus a dispenser if the model has one.
A sink is a bigger project. On an island, the best choice is a double-bowl undermount with 3 or 4 holes, which leaves room for a faucet and accessories.
Because an undermount hangs beneath the countertop, a new one needs a new cutout, and moving the island sink means plumbing work.
If you want a statement piece, an apron-front sink in granite composite or quartz looks best against a good counter. A prep sink and prep faucet pair well with either.
Recommended Products

Perfect Fit for Any Space: Easily adjust the height from 24.92" to 32.68", making these bar stools an ideal match for kitchen counters, home bars, cafés, and restaurants with counter heights from 34 to 47 inches. Whether you're entertaining guests or enjoying a quiet meal, the customizable height ensures maximum convenience.

Quality Material: Made of high-quality particleboard, the bar stool top is smooth and easy to clean, preventing sharp corners from scratching the clothes. The panel is paired with thickened metal legs and foot support ring

!!!If you purchased a multi-piece set, your items may ship separately and arrive on different days. Please allow up to 7 business days for all packages to be delivered.
10. Theme and Palette
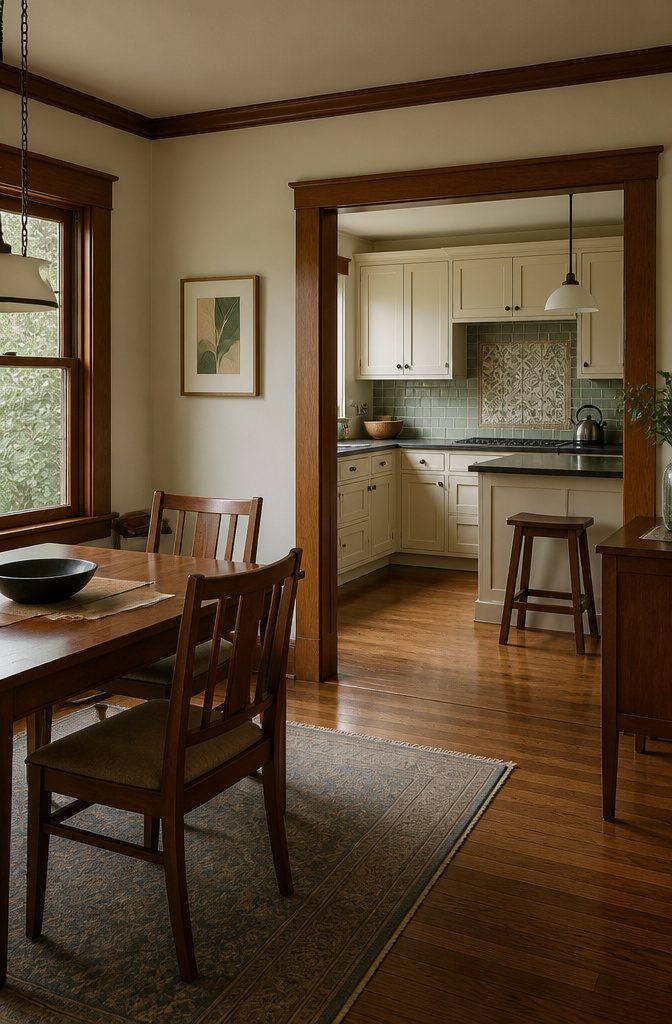
Choose a theme before you choose a finish.
There are 14 to pick from, including rustic, country farmhouse, craftsman, cottage, contemporary and retro. Take your cues from the house and its surroundings, because a retro look will clash with the original trim and floors of a craftsman home.
Keep the palette simple, since fancy colors date fast, and let reflective surfaces or patterned tile add interest.
Sound existing pieces also stretch a budget, as this Connecticut couple found:
The answer was to preserve elements of the existing kitchen that were still in good shape, cut out labor costs by doing the work themselves, and shop sales and Craigslist.
Build your palette around what you keep.
Recommended Products

NANO HONEYCOMB TEXTURE & 16-GAUGE T304 STEEL: Crafted from heavy-duty 16-gauge T304 stainless steel with an advanced PVD Nano Honeycomb finish. This embossed texture is specifically engineered to hide scratches and repel water like a lotus leaf, ensuring superior rust resistance and a long-lasting, commercial-grade appearance compared to standard satin finish sinks.

[Large Worktop] The 23.6”D x 47.2”W surface of this kitchen island allows you to prepare food while being spacious to keep a toaster or coffee machine close by. Large worktop for great convenience!
11. Island or Breakfast Seating
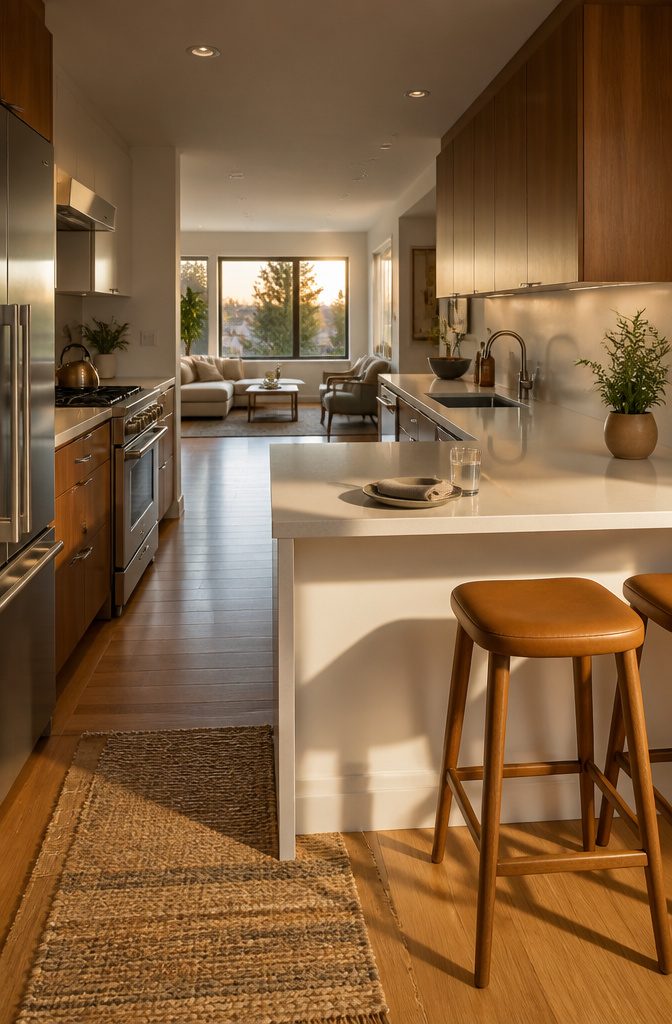
A peninsula fits a galley or any kitchen with one open end.
In a San Francisco galley, one holds two stools so friends can sit while the hosts cook. An island needs more floor, with 36–48 inches of clearance on every side, so skip it in a tight room.
In one kitchen with three doorways, a granite-topped island with a prep sink and bar stools only fit after a short peninsula and a table blocking the window came out.
Large kitchens can also take a bistro table or a small breakfast area. If you host often, place the seating so it keeps a clear sight line to the next room.
12. Accessories and Greenery
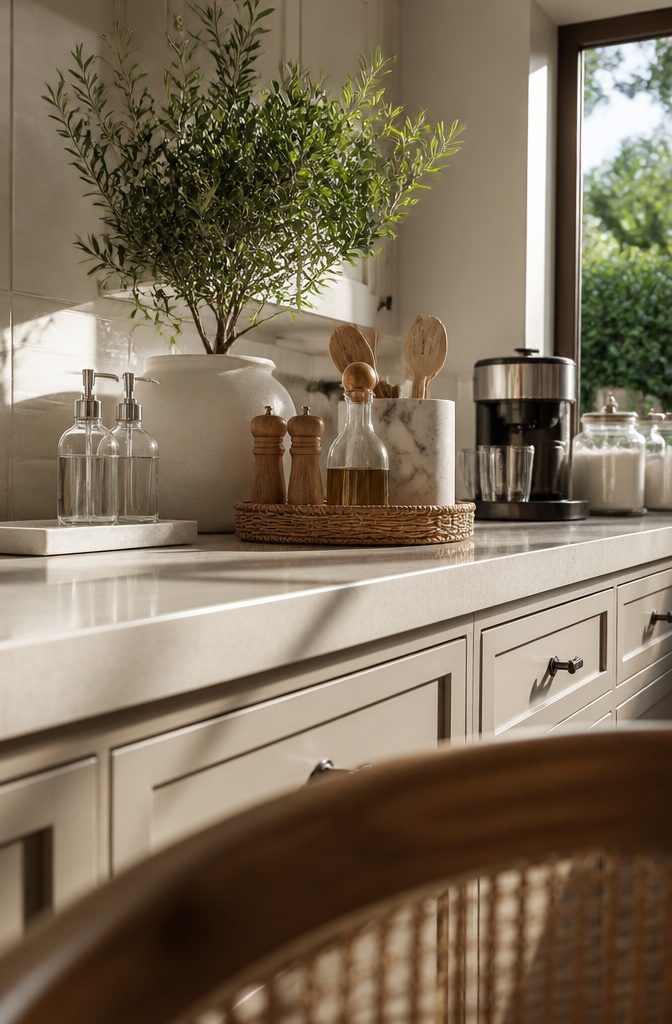
Accessories are the lowest-cost, most reversible kitchen update, and the best fit for renters, since everything leaves with you at move-out.
Start at the sink with a pair of 16-ounce clear soap pumps in a resin tray. Matching bottles look deliberate, and the cost is two pumps and a tray.
Group the rest on trays so the counter looks styled instead of cluttered. A round woven tray can hold a marble wine cooler as a utensil holder, a glass oil bottle, and salt and pepper mills.
A round wood tray suits a coffee maker and a few glass cups. Two glass jars for flour and sugar fill a corner.
Add one plant in a good planter, or faux greenery branches in a large white one. Keep the count low; a few pieces beat a crowded counter.
Set Purpose, Size and Budget
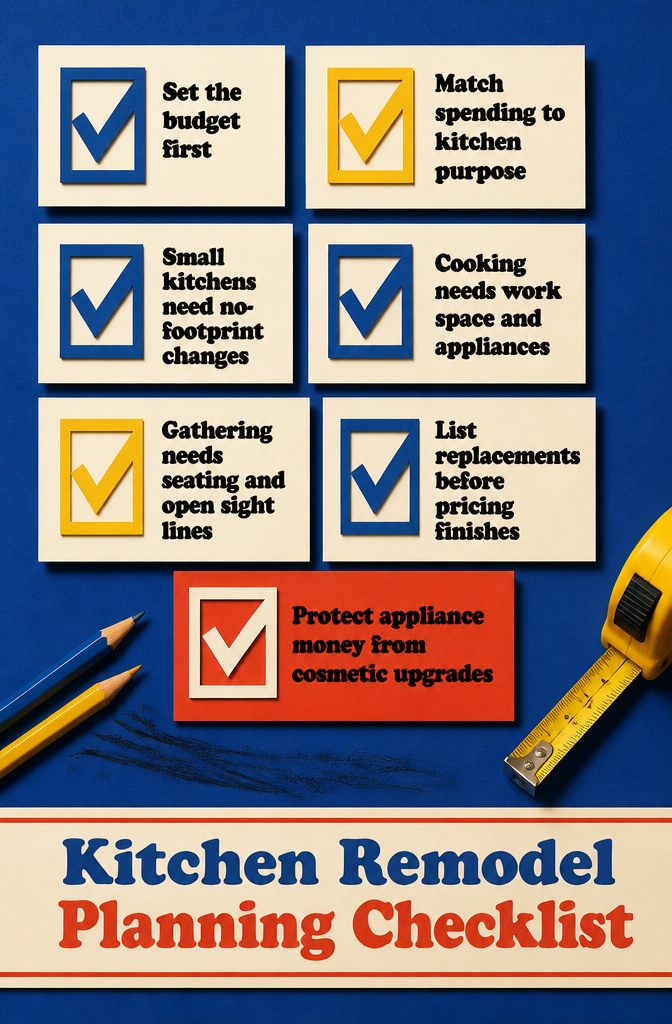
Answer three questions before you pick anything from this list:
- Budget. Set the number first. Ideas that change walls or layout take a bigger share of it than ideas that change surfaces and fixtures.
- Purpose. Decide what the remodel is for. A kitchen for heavy cooking puts money into work space and appliances. A kitchen where people gather puts it into seating and open sight lines.
- Size. A small kitchen rules out ideas that need floor space, such as an island. Choose changes that add no footprint.
- Furnishings and appliances. There is little to brainstorm here: match what you need to what you can spend. List the pieces you must replace before you price finishes, so appliances don’t get squeezed out by cosmetic upgrades.
Layout Shapes and the Work Triangle
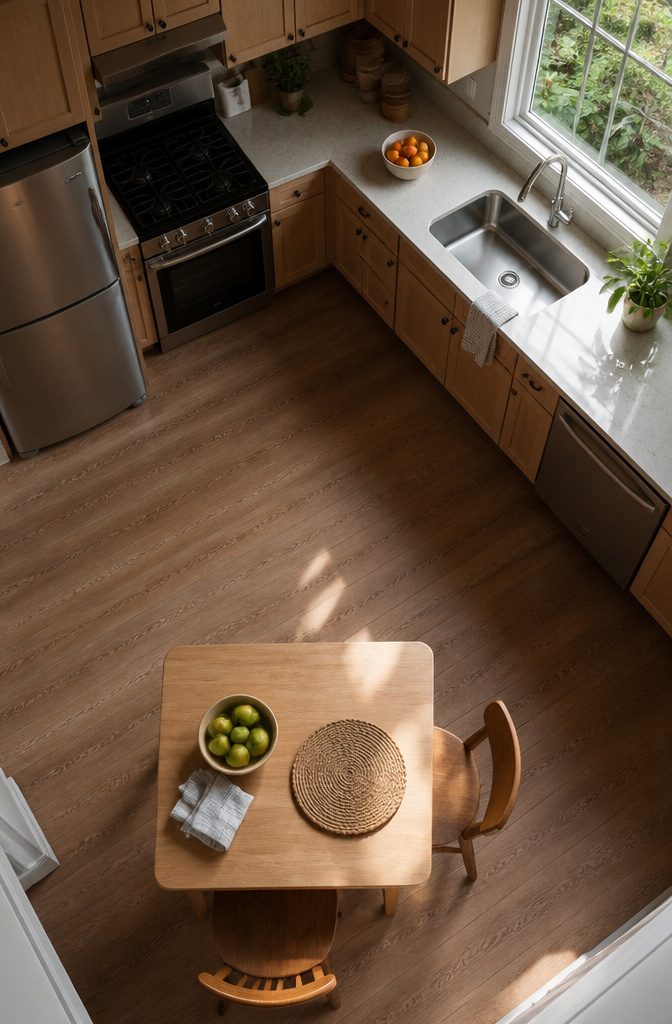
Six layouts cover most kitchens, and the one you have sets how much you can change:
- U-shaped: cabinets run along three walls, so the sink, stove and fridge sit close together.
- L-shaped: two adjoining walls, which leaves the rest of the room open for a table.
- Island: a freestanding block added to the floor plan. It helps tighten the triangle below.
- G-shaped or peninsula: a U with an extra arm that doubles as a counter.
- Galley: two long parallel walls with a walkway between them.
- One-wall: everything on a single wall, usually found in smaller apartments.
The work triangle was developed by the Illinois School of Architecture in the 1940s.
It links the refrigerator, stove and sink, and the shorter the distances between those three, the smoother cooking flows from fridge to prep to stove. Task zones refine this by grouping tools around each job.
Real Kitchen Budgets
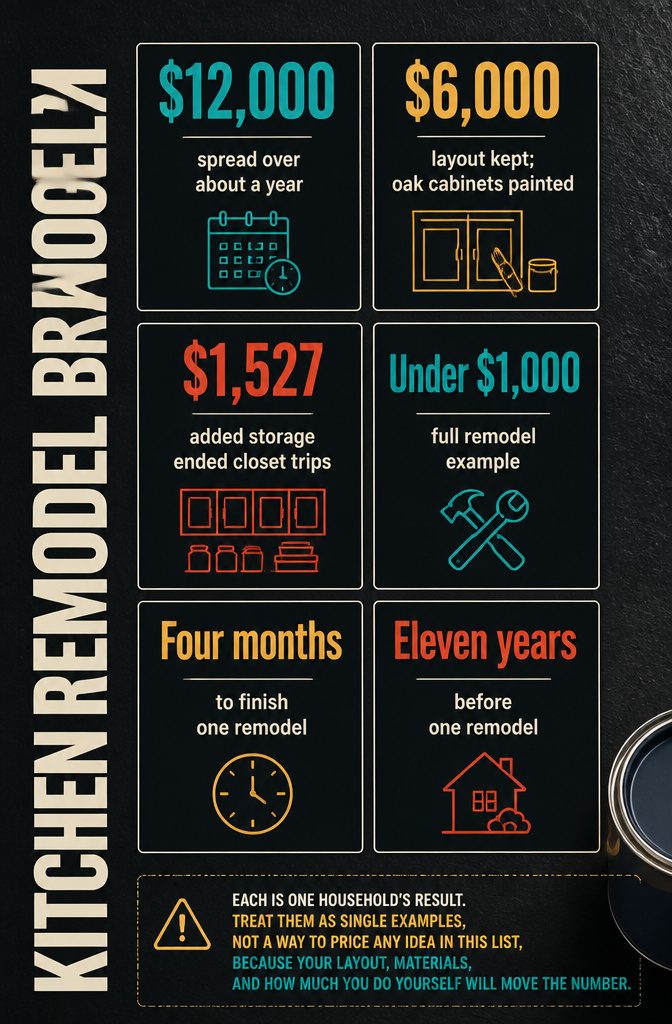
These are finished projects, each with a different budget or timeline:
- $12,000: spread over about a year.
- $6,000: a Connecticut couple kept the layout, painted the oak cabinets instead of replacing them, took a carpentry course, and bought replacements on sale and through Craigslist.
- $1,527: nights and weekends of work added upper cabinets, hardware, fixtures, and trim. The new storage ended the walks to a guest bedroom closet for pots and Tupperware.
- Under $1,000: a full remodel for less than that.
- 4 months: one remodel finished in that time.
- 11 years: how long one couple waited before remodeling.
Each is one household’s result. Treat them as single examples, not a way to price any idea in this list, because your layout, materials, and how much you do yourself will move the number.
Frequently Asked Questions
What are some kitchen remodel ideas on a budget?
Keep the layout and spend on surfaces and fixtures instead of walls.
Painting the cabinets, swapping the knobs, spraying yellowed recessed-light trim white, adding a peel-and-stick backsplash or countertop covering, installing drawer organizers, and styling the counter with trays are all low-cost changes.
Moving walls, sinks, or cooktops takes a far larger share of the budget.